Google Local Business Center Adds Photos, Attributes, Maps Corrections & Stats
The Google Local Business Center has just added four new features for business owners who want to maintain a Google Local Business listing. Below, a step-by-step guide to how you can adjust the marker for your business, add a photo to your listing, add custom attributes and see statistics on how your listing is performing. […]
The Google Local Business Center has just added four new features for business owners who want to maintain a Google Local Business listing. Below, a step-by-step guide to how you can adjust the marker for your business, add a photo to your listing, add custom attributes and see statistics on how your listing is performing.
First, a bit more about each new feature. You can now:
- Add photos to your Google Maps listing (within the guidelines)
- Add custom attributes to your business listings
- Correct and adjust your Google map marker location, so if it is slightly off, you can move it to the right spot
- You can now see statistics on how many people viewed and clicked on your local business listings
How do you use these features? Let me walk you through how I updated my business listing.
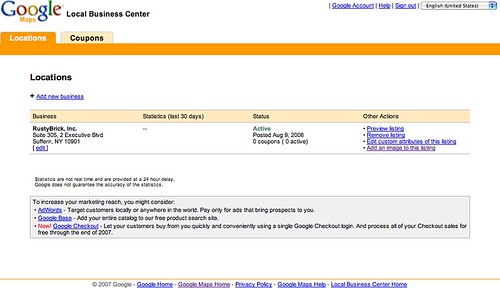
Upload photos: Go to Google Local Business Center and login under your account that is associated with your business listing. If you don’t have one, then you need to set one up. The screen should look like this, if you have a business listing.
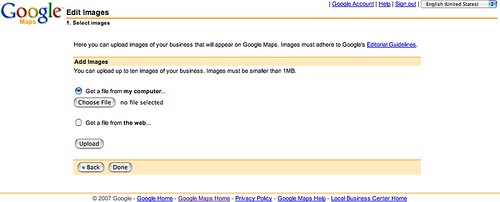
Now, click on the “Edit images of this listing” to upload photos, you should see a screen that allows you to upload images from your disk or via a Web page. Here is a screen capture.
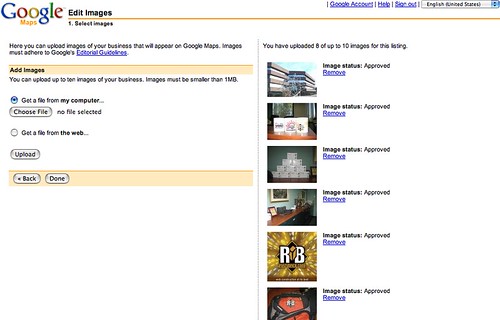
You can see I uploaded several pictures that I found on my disk.
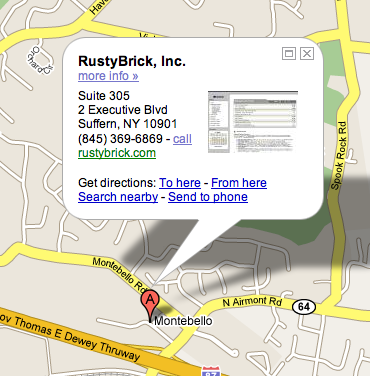
Why is this important? Since Google starting showing random photos on Google Maps, you may want to tell Google which photos you want shown for your listing. For example, currently for my listing Google is showing some weird screen shot that happens to rank well for that search term in Google Image search. Here is a screen capture of what Google shows now, I hope they update soon with my new images that I selected.
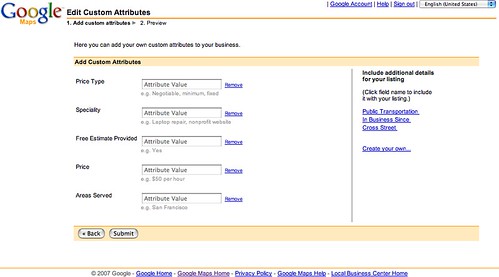
Add custom attributes to your business listing: To do so, on your Google Local Business Center click on “Edit custom attributes of this listing” and you will be taken to this screen.
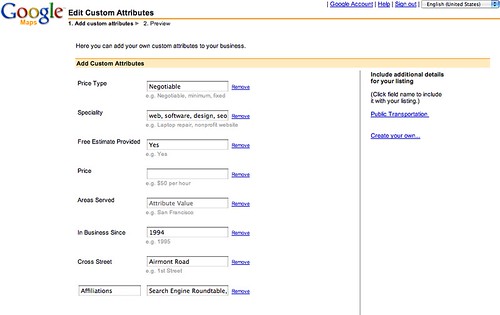
Fill in those attributes and even add new ones like, “In business since” and some custom ones. Here is what I added for my business.
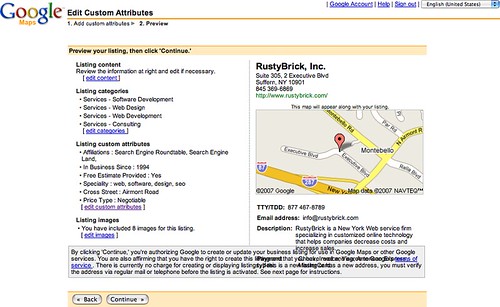
After you proceed, you are asked to confirm the changes on this page.
Click continue and you are done with your custom attributes.
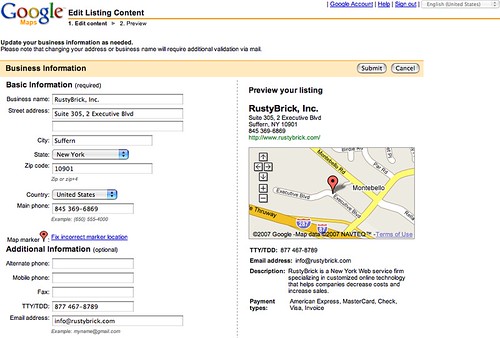
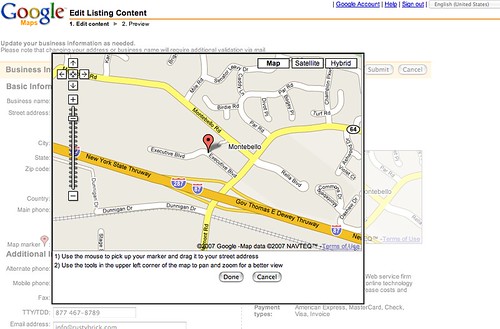
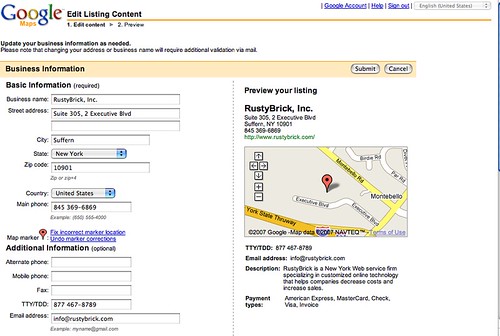
Edit Google Maps Marker: If you Google Maps marker is off, mine was a bit off, you can move the marker to the proper location. To do so, go back to Google Local Business Center click on “Edit” under your business address. You are then taken to a screen to upload your demographic information for your business. In the middle of the page on the left side it says “Fix incorrect marker location” click on that. It looks like this:
After clicking on that link and a DHTML pop up will come up. You can now drag and drop the marker on the proper location. It looks like this:
After you are happy with the new location of the market, click “done.” As you can see from my screen capture below, I moved mine slightly up and to the left.
Listing Statistics: The new statistics that will show impressions and clickthroughs are visible on the Google Local Business Center page for only you to see. Here is a screen shot showing me no data. I assume it will update within the month.
That is my tutorial on Google Local Business Center’s new features. Go out and check them out for your business.
Related stories
New on Search Engine Land
