Free Schema Markup Generator
Generated JSON-LD
Live output updates as you edit the form. Paste this directly into your page template.
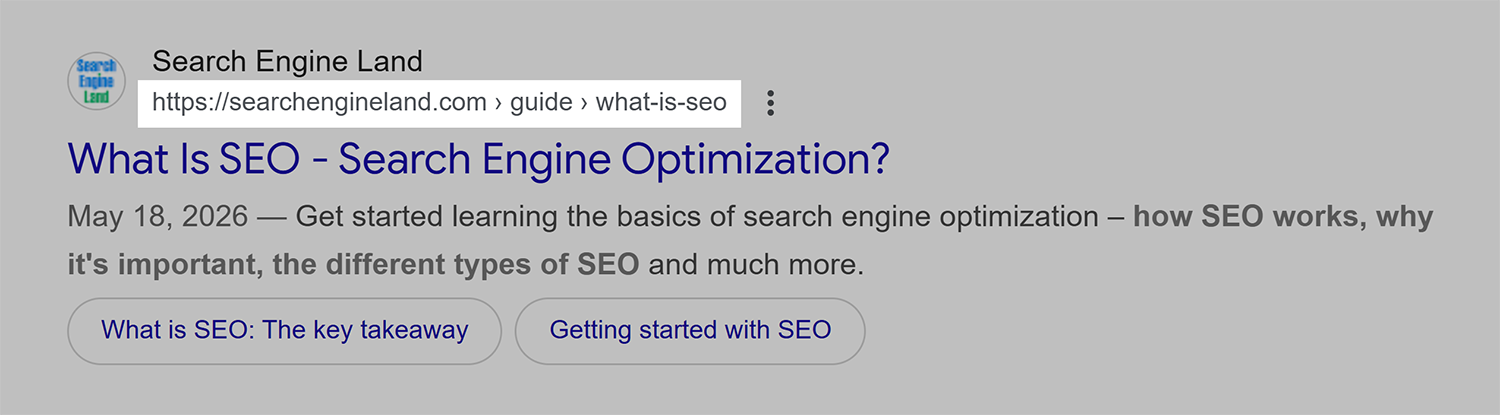
Use our Schema Markup Generator Tool to build your own schema quickly and accurately for 15 schema types like Organization, Reviews, FAQ and more!
If you’re looking for a way to quickly and easily implement schema markup on your site, check out our free Schema Markup Generator Tool.
The guide below shows how the tool works, what schema markup it supports, and get tips on best practices for implementing the generated schema on your website.
What is schema?
Schema (often called “schema markup”) is a type of structured data that helps search engines and AI crawlers understand your website and content.
Specifically, schema adds a machine-readable layer to a website’s code that makes connections between the content and specific entities — that is, people, brands, products, concepts, and other related things.
Google can read a webpage’s visible content using techniques like natural language processing (NLP), but adding schema makes entity relationships explicit. This ensures that Google indexes the content accurately and links the page to the right entries in the Knowledge Graph, a huge database of facts and information used to populate various search features.
For example, when Google crawls a webpage, it can read text and “see” images, but it doesn’t always know what that content refers to in context:
- Is “Casablanca” a movie, a city, or a restaurant?
- Does “$25” refer to a price, a discount, or an added service?
- Does a social media link point to the company that owns the website, the person who wrote the article, or a partner brand?
- Is an image a logo, a header graphic, or part of the main body content?
Humans can understand the context of these things by reading the content. Schema annotates that content to make sure bots understand them the same way.
It’s called “schema” because the vocabulary, syntax, and relationships for these labels comes from Schema.org, a project created jointly by Google, Bing, Yahoo, and Yandex. However, not all features of Schema.org’s syntax are supported by Google and others.
That’s why it’s important to have a tool that can help you generate valid schema for your site.
Why schema is important in SEO and AI search
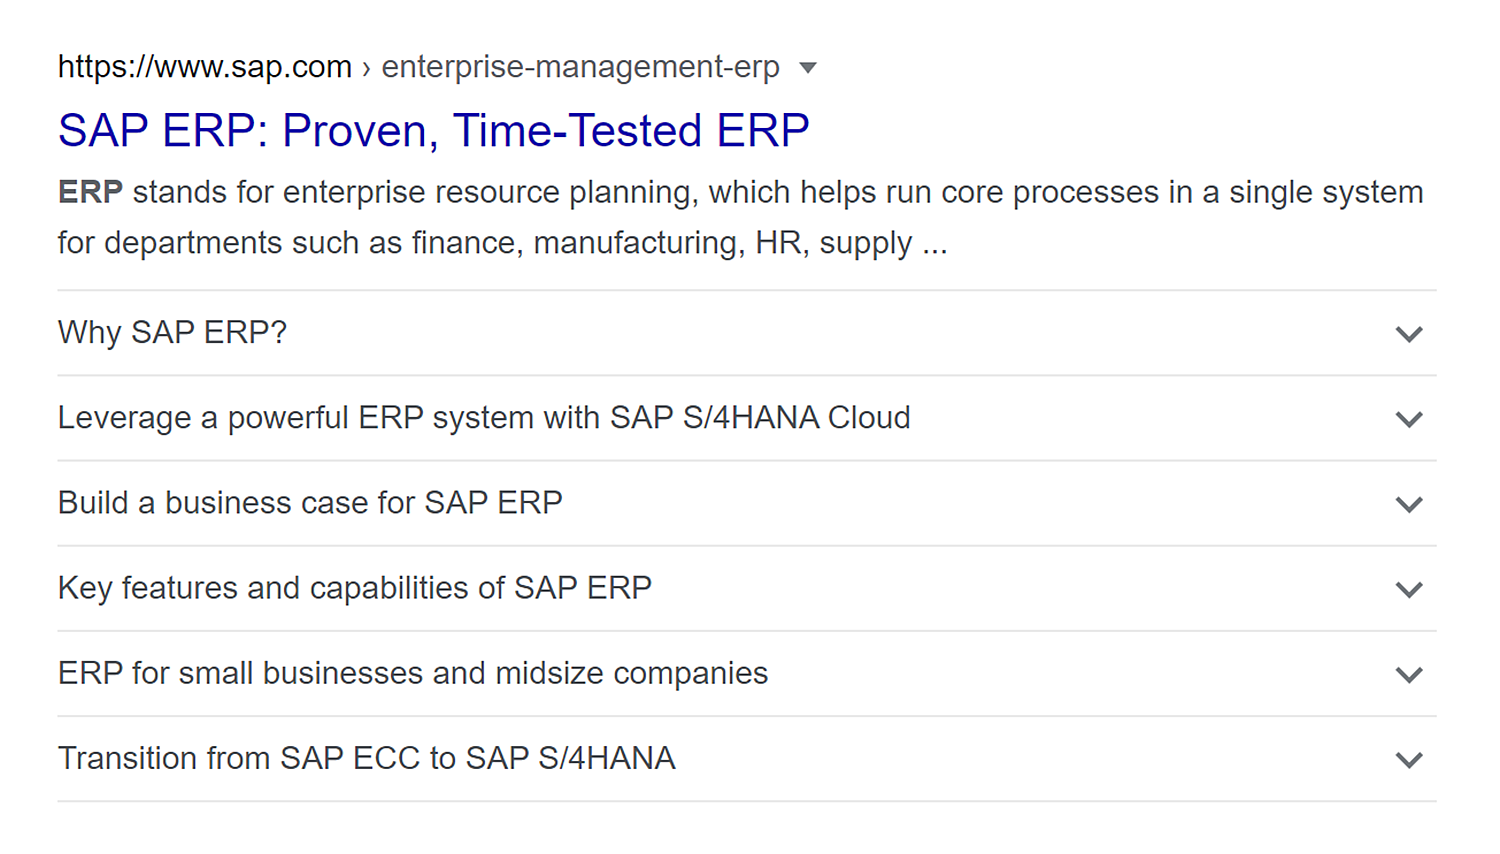
Schema allows search engines (including AI search) to show your website using “rich results” in search engine results pages (SERPs) instead of only showing plain blue links.
For example, if you have a website full of recipes, adding schema lets Google show it as a recipe card that includes things like:
- Ratings
- Prep time
- Ingredients

Eye-catching results like these tend to get more clicks.
Schema is usually added to the page using JSON-LD, a small snippet of JavaScript code that visitors never see (although the same information may be visible to users elsewhere on the page).
What tools can you use to create schema markup?
Search Engine Land’s Schema Markup Generator Tool helps you automatically create code that you can insert into your content so Googlebot and other search engine crawlers can easily find and read it.
If you’re not sure exactly how to insert the code, don’t worry, we’ll go over that a bit further below. For now, let’s look at the types of schema you can generate with the tool.
What schema types can you markup with the Schema Markup Generator Tool?
Google only supports some of the schema types defined by Schema.org. Our Schema Markup Generator Tool covers the most common types of schema used by websites.
Aggregate Rating
Aggregate Ratings provide a single average score along with a review count. They typically show up in Google search results as star ratings followed by the review count in parentheses.

Ratings are typically attached to other schema types, including:
- Product
- Local Business
- Restaurant
- Movie
- Book
- Software Application
- Course
- Event
- Organization
- Creative Work
When generating your schema, the tool will ask you which type of schema the rating applies to.
Article
An article is a general type of website content. Article schema makes it easier for Google to display headlines, dates, and other information in news carousels and “Top stories” sections.

Article schema can be used for a variety of content on a website, such as:
- News stories
- Blog posts
- Editorial content
- Press releases
Breadcrumb
Website breadcrumbs show the navigation hierarchy of a site, making it easier for both users and bots to see where they are. They’re like the breadcrumbs that helped Hansel and Gretel find their way home from the forest — except birds can’t eat the website kind.
In search results, Breadcrumb schema allows Google to replace less friendly URL strings with the page’s navigation path.
This lets users see if the location of the page within a website aligns with the type of content they’re looking for.
Event
Event schema provides an easy way for Google to add an event card with details like date, time, and ticket prices.

An event has specific start and end dates and/or times. This includes things like:
- Concerts
- Webinars
- Single classes (i.e., not courses with multiple classes that take place over multiple days/weeks/months)
- Conferences
Events can also include in-person, online, and hybrid functions.
FAQ Page
FAQ Page schema provides simple, well formatted question-and-answer pairs for common questions on a website.
In the past, Google used FAQ Page schema to show questions and answers in SERP features. They may have also become Actions on Google Assistant. In 2023 Google began only showing FAQ Page schema from authoritative government and health-focused websites. Then in 2026 Google announced they will no longer show FAQ schema for any sites.
Pro tip: While Google doesn’t show FAQ schema in search results anymore, AI search agents for other platforms may use FAQ Page schema from many other sites to inform their own generated results. When in doubt, add schema to your FAQ page, and let search engines use or ignore it as they want.
How To
How To schema provides a way to mark up step-by-step instructions. Previously, Google would show these steps as part of search results, but it stopped providing support for how-to rich results in 2023.
However, other AI search engines may still be able to read How To schema. The Schema Markup Generator Tool provides the option to generate How To structured data if desired.
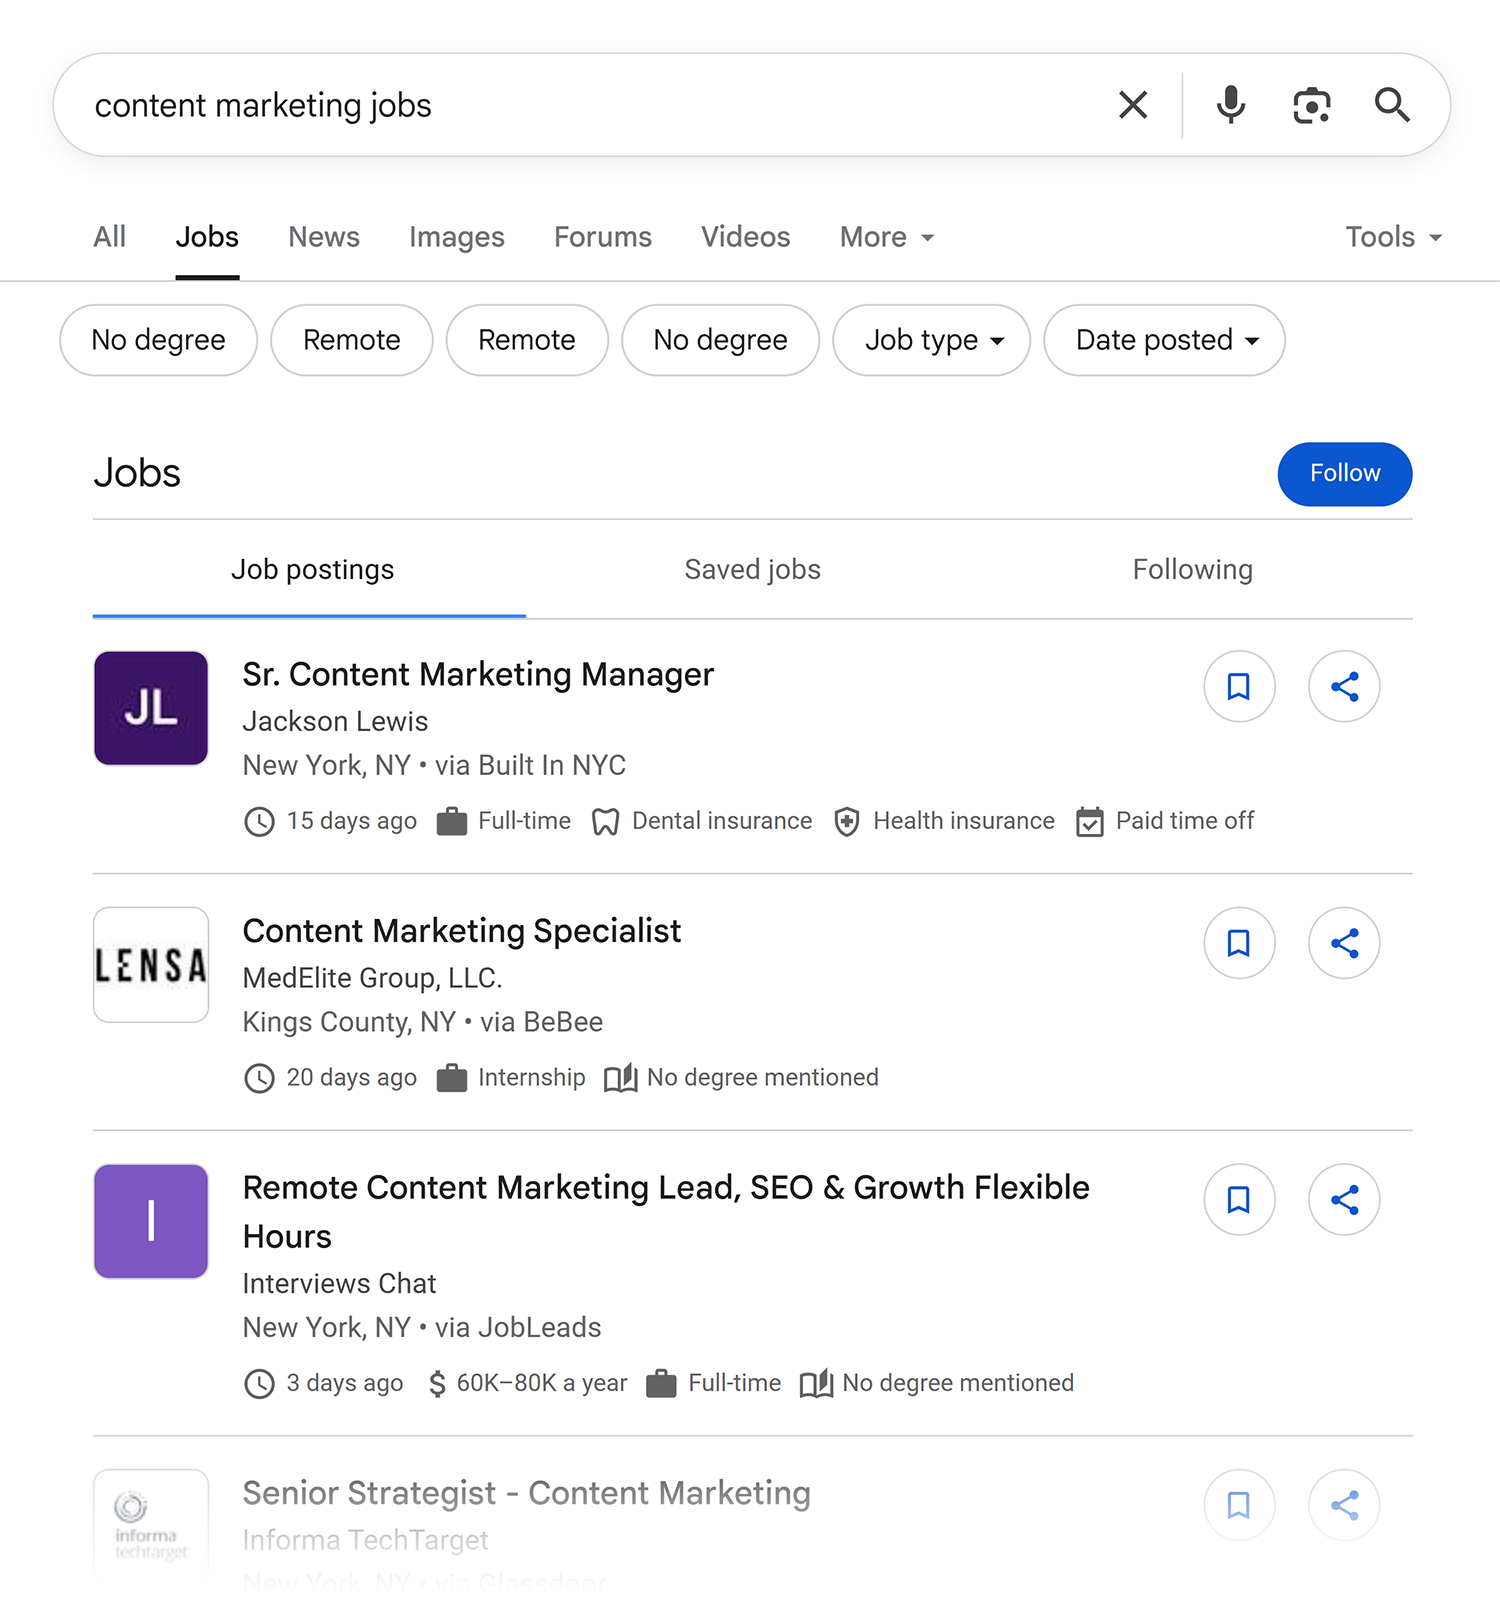
Job Posting
Job Posting schema provides details related to an open job listing.
In particular, it lets Google include details in the Jobs tab, like:
- Job title
- Company name and logo
- Location
- Salary
- Employment type
- Degree or credential requirements
Local Business
The Local Business schema includes information about local retail establishments, restaurants, lodging, service providers, and other businesses that support the local community.
Typically, this schema should appear on a business’s homepage or another page that provides information about the business, such as an about page, contact page, or locations page.
Sites that provide listings or reviews of local businesses also use the Local Business schema to provide information about the business being listed.
Google uses information from the Local Business schema to populate local packs, map details, and other SERP features.

Note: Since Local Business is a subtype of Organization (the schema type discussed next), you don’t need to have both on your site.
Organization
Organization schema describes the company or brand that the website belongs to. It’s more general than Local Business schema, and it’s often used by company headquarters or businesses that don’t directly serve the local public.
Information from this schema is used in various SERP features, including detailed information in Knowledge Panels and logos in search listings.

This schema usually goes on a page that provides detailed information about the organization, such as an about or company history page.
Some other schema types can use shortened versions of Organization schema to indicate a relationship. For example, Event schema allows an organization to be included as the organizer of the event.
Person
Person schema shares details about an individual, most commonly for a profile or bio page.
Details that can be added include:
- Name
- Job title
- Affiliations
- Photo
- Social profiles
These details may be pulled into Knowledge Panels related to the person, as well as organizations and topics related to them.

Some other schema types, such as Article and Review, can include a shortened version of Person schema to indicate the author of the article or review.
Product
Product schema includes the name, description, and images of a product, along with important consumer information like pricing and identifiers like a SKU or manufacturer part number (MPN). It can also include Aggregate Rating schema.
This schema commonly appears on detailed product pages. However, schema that includes product snippets also can be used on reviews, shopping aggregators, and similar pages that list or focus on products.
Google uses Product schema details in its main search results, as well as the Shopping tab. Product images can appear in Google Images.

Recipe
Recipe schema can be extremely detailed, including everything from the recipe name and description to detailed ingredient lists and steps. It also can include information like prep and cook time, yield, and rating information.
Recipe cards often show a summary of this information in standard Google search results.

Review
Review schema represents a single person’s critique of a product, business, or creative work or performance, such as a book, movie, or concert. It typically includes a written opinion about the reviewed entity, a rating, and the author (using Person schema).
Review schema can be used on standalone reviews or as part of multiple reviews. It’s often paired with Aggregate Rating schema within Product schema to provide multiple reviews about that product.

Video
Video schema describes the content and metadata of a video on a webpage.
Details provided by the schema include:
- Title
- Description
- Publisher
- Thumbnail
- Duration
- Upload date
Google uses this information in standard search results and video search.

Website
Website schema provides the core details about your website to Google, including the name, description, and homepage URL. It also allows you to specify an alternate name, such as a shorter name for the website if the name is long.
Google states that Website schema must be on the website’s home page.
The Website schema is most important for making sure your website name appears as you want it to in search results. However, Google may also take hints for the website from other website code, such as the Open Graph site name property (og:site_name) and the title tag.
Schema best practices
The key best practices for working with schema include:
- Use JSON-LD format
- Implement it consistently across your site
- Test and validate your schema to ensure it’s working properly
Schema format: JSON-LD
Google recommends formatting your schema with JSON-LD, a form of JavaScript that’s easy for both humans and bots to read.
While there are other formats that could be used, specifically Microdata and RDFa, JSON-LD is the easiest to deploy and maintain across a website.
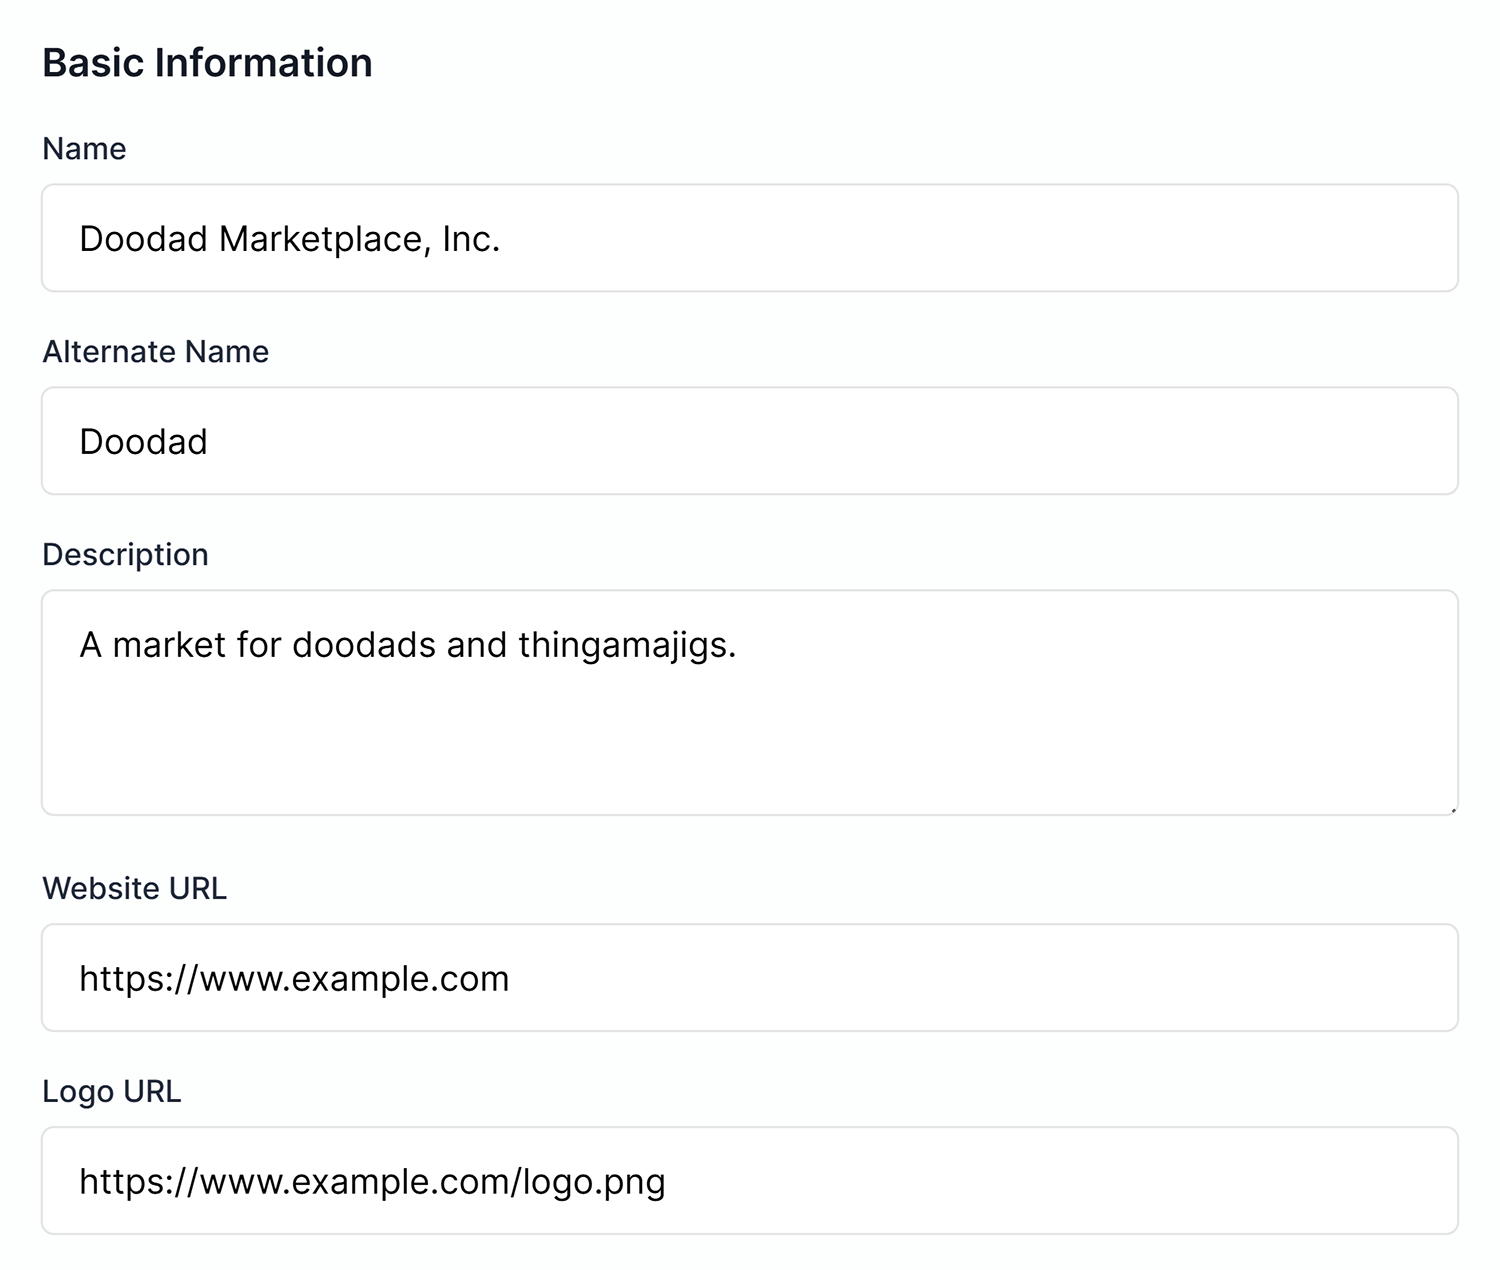
A simple website schema formatted in JSON-LD looks like this:
<script type="application/ld+json">
{
  "@context": "https://schema.org",
  "@type": "WebSite",
  "name": "Doodad Marketplace",
  "url": "https://www.example.com",
  "description": "A market for doodads and thingamajigs.",
  "alternateName": "Doodad"
}
</script>
The one exception is that Google recommends using Microdata format when implementing schema in discussion forums.
Schema implementation options
It’s important to implement schema consistently and correctly across your website. This means using a programmatic solution, such as server-side processing or a plugin for your content management system (CMS).
Schema is most often added to your webpage’s <head> or <body> tag.
Since a large percentage of websites use WordPress, here are a few options:
- Automated schema: RankMath and Yoast SEO both add schema automatically. This can be useful for quick site-wide implementations, but both are limited in terms of customizability.
- Custom schema: Plugins like WPCode, Code Snippets, and Head & Footer Code allow you to insert your own code where you want it. You can even add schema on a single page using a custom HTML block.
- Themes: Some WordPress themes allow you to insert header or footer scripts in the theme settings.
For other content systems, look for similar plugins or themes that allow the insertion of JavaScript in the page’s footer or header.
Google can also read dynamically generated JSON-LD data added via JavaScript or a tag management system like Google Tag Manager (GTM). However, this can be complicated, so if you’re not already an expert, stick to one of the methods above.
Testing and validation
Before implementing schema on your site, test it using the “Test” button on the Schema Markup Generator Tool. This will take you to Schema.org’s schema validator.
To use the validator, provide your website URL or paste in the code you want to test, then click “Run test” to see the results.

You can also use Google’s rich results tester to see how Google is parsing your page.
Keep in mind that some rich results come from other sources than schema. The “Detected structured data” section shows what schema Google is picking up.

How to add schema to your site
To add schema to your site, follow this step-by-step process.
Step 1: Generate the schema
Use the free Schema Markup Generator Tool to quickly generate the schema you want to add to your site. We’ll go through an example using Organization schema.
Formatting note: You may notice that schema code combines multiple words into one long word, capitalizing the second (e.g., librarySystem). In this guide, we’ve separated the words for legibility, but you’ll want to retain the capitalization provided by the tool when coding.
First, select “Organization” from the “Schema Type” dropdown box.

Next, choose the type of organization represented by your website.
Options include:
- Organization
- Airline
- Consortium
- Corporation
- Educational organization
- Funding scheme
- Government organization
- Library system
- Medical organization
- NGO (non-governmental organization)
- News media organization
- Performing group
- Project
- Sports organization
- Worker’s union
We’ll choose “Corporation” for this example.

Next, complete the basic information fields for your organization, including:
- Name
- Alternate Name (optional)
- Description
- Website URL
- Logo URL
If the organization maintains a social media presence, check the boxes for the platforms where it has a profile. Options include:
- Twitter (now X)
- YouTube
- GitHub
- TikTok
For each platform you select, provide a URL to your social media profile on that platform.

Finally, we recommend adding at least one point of contact.
Click “Add Contact Point” and complete the following fields:
- Contact Type: Options include customer service, technical support, billing support, bill payment, sales, reservations, credit card support, emergency, baggage tracking, roadside assistance, and package tracking
- Telephone: The phone number for that specific type of contact
- Email: The email that routes to that contact type
- Area Served: The country or countries this contact supports
- Available Language: The language(s) supported by the contact type
- Contact Option: Whether the contact provides toll-free and/or hearing impaired support
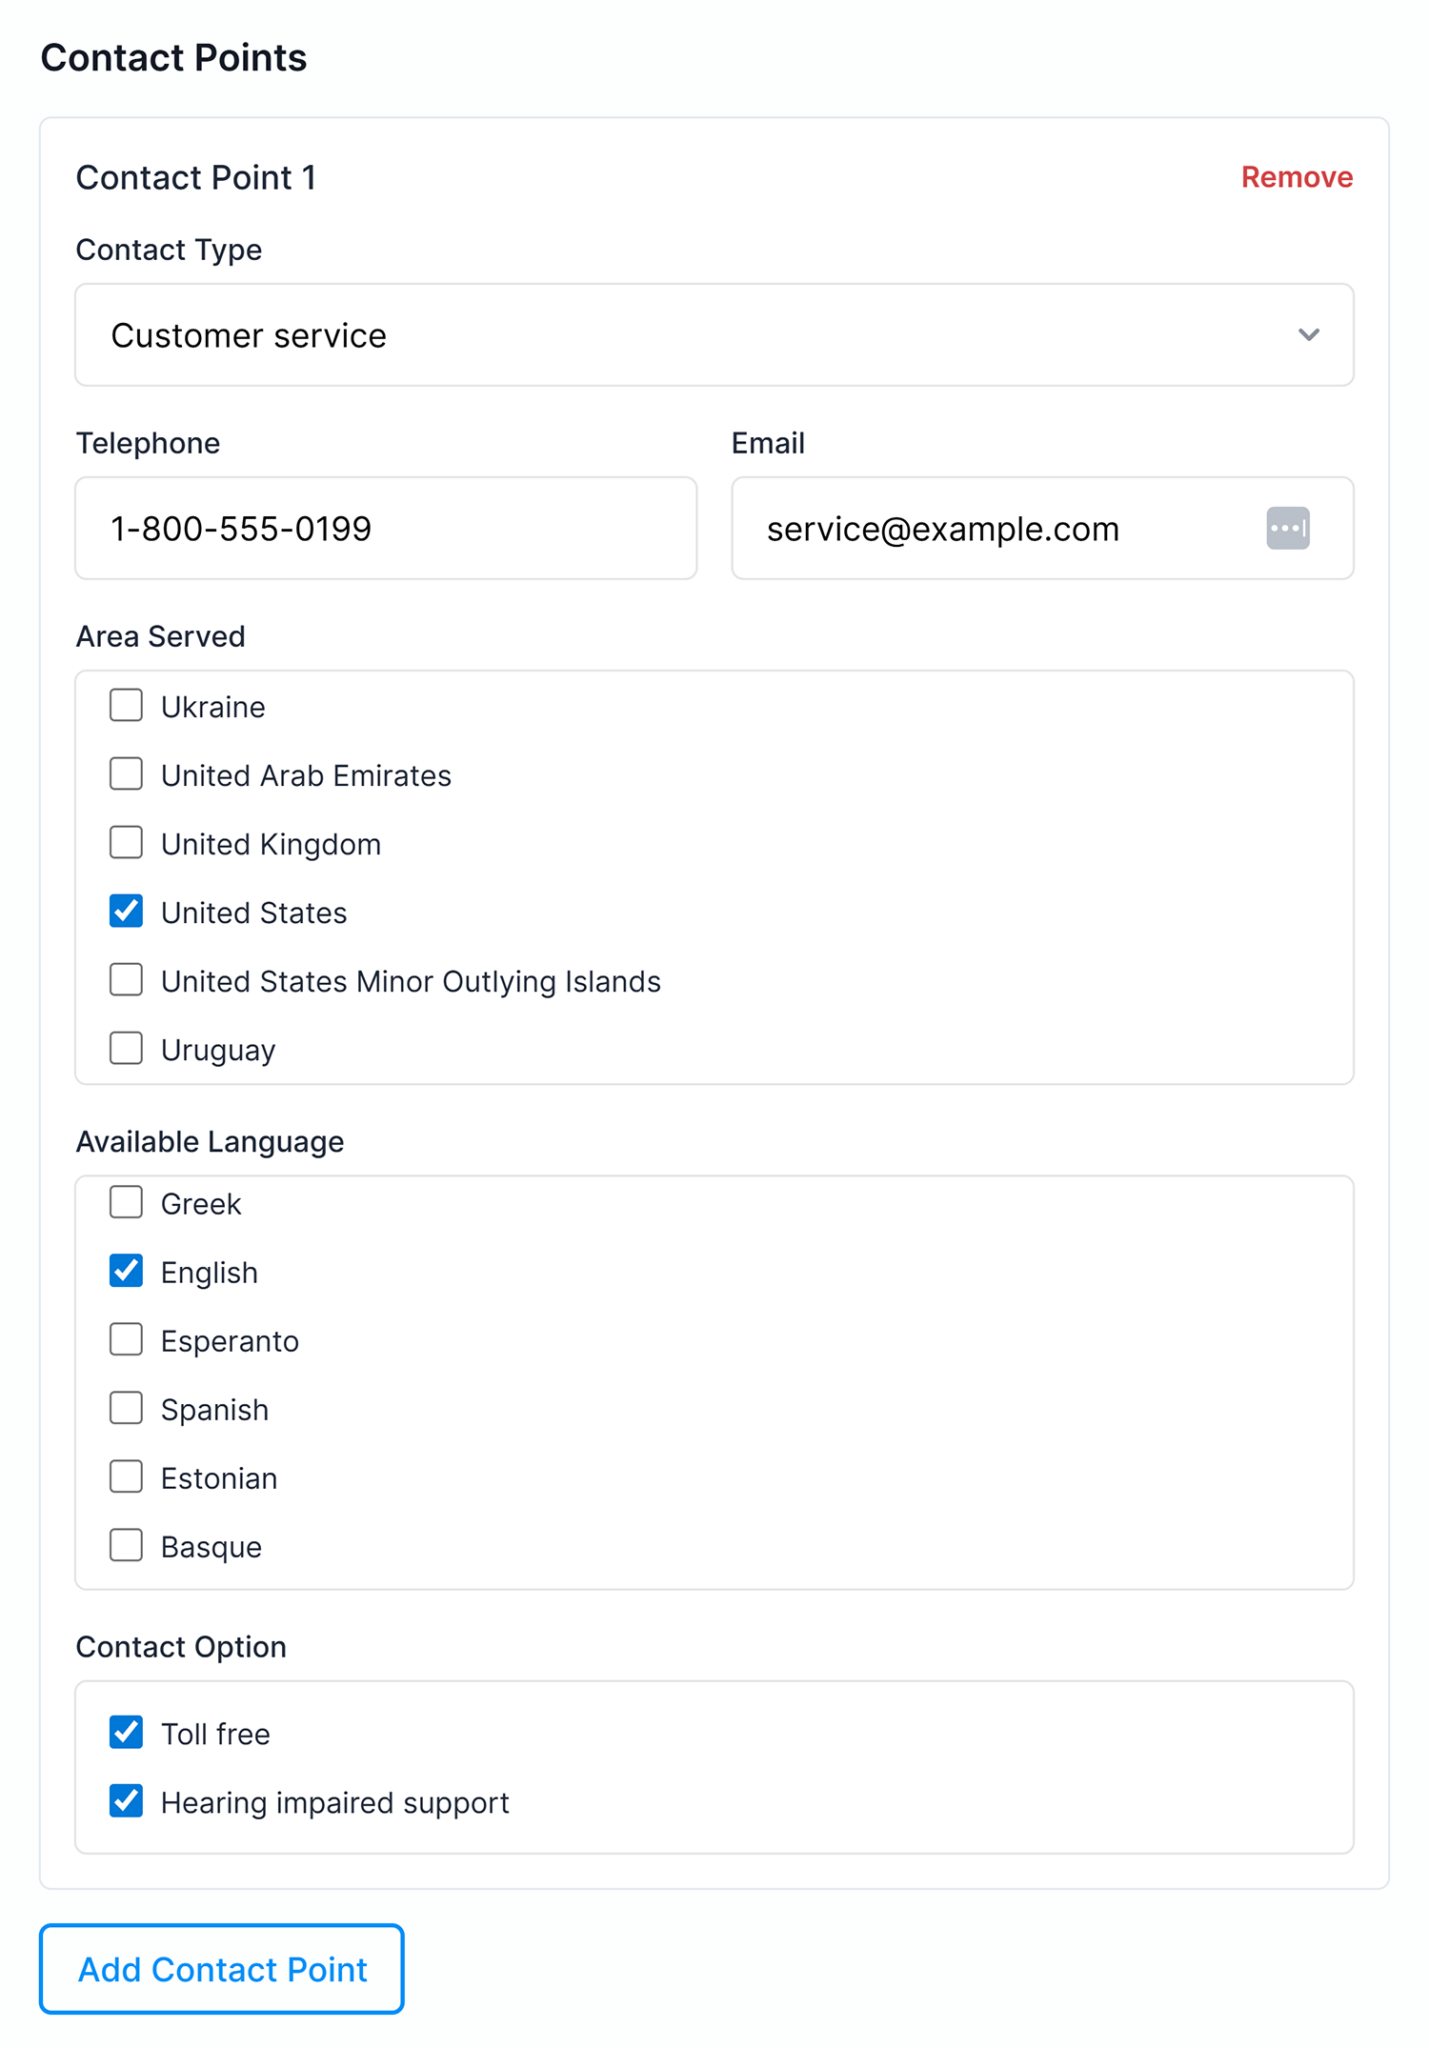
You can add as many contact points as necessary. For example, you may want to add contacts for each area served or to route customers to the right department.
As information is filled in, schema will appear in the “Generated JSON-LD” box. You can copy, test, validate, or reset it using the buttons above the code.

Step 2: Implement schema consistently across the site
Once your JSON-LD schema is generated, add it to the <head> or <body> of your website. Google can read schema in both places, so it’s a matter of preference where you put it.
Here are a few options:
- Head: This is often the easiest for programmatic solutions.
- Body: Some people prefer to put schema in the HTML body so it doesn’t delay document loading. If you run into page speed issues, this may be a good option.
- Split: Another option is to split the implementation by putting sitewide schema in the head, while putting page-specific schema in the body. This requires more work to maintain, but it may be clearer when making updates across the site versus on specific pages.
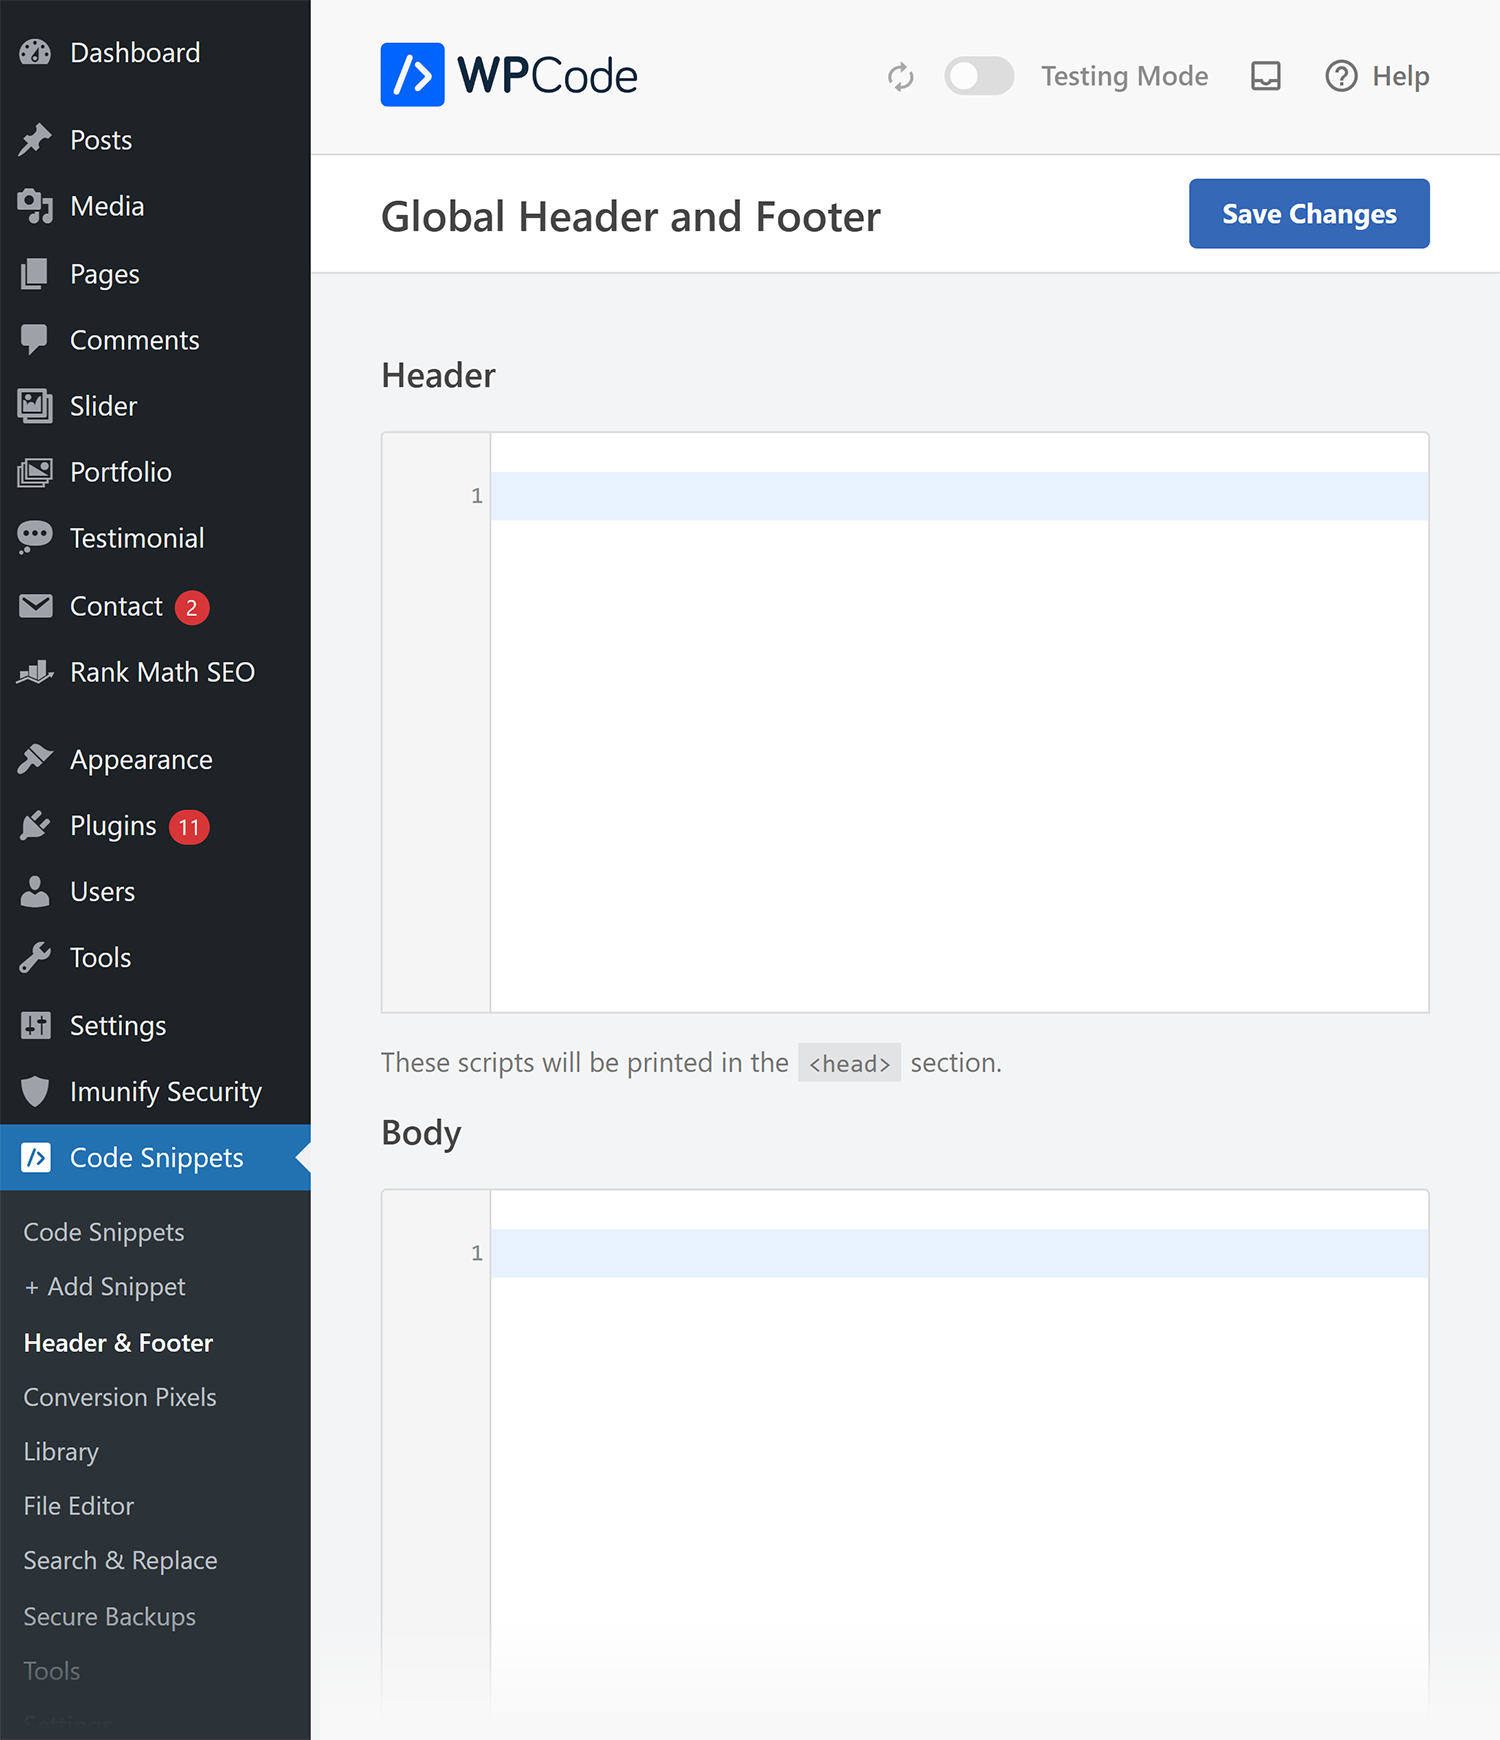
How you add the schema will depend on your setup. A popular WordPress plugin to implement schema is WPCode Lite, which we will use in the examples below.
Once the plugin is installed, visit the “Code Snippets” > “Header & Footer” section of your admin dashboard. You’ll see three sections:
- Header: Adds code to the
<head>tag of every page on your site - Body: Adds code to the top of the
<body>tag of every page on your site - Footer: Adds code to the bottom of the
<body>tag of every page on your site
A lot of schema types should only be added to specific pages. For example, the Organization schema we generated in step one should only be added to a page describing the organization behind the website.
To add a snippet of code to a single page, go to “+ Add Snippet” and click the “+ Add Custom Snippet” button.

The first option for the new snippet determines what kind of snippet it is. Choose “HTML Snippet” here.

Note: Technically, JSON-LD is a form of JavaScript. However, the Schema Markup Generator Tool includes <script> tags in the generated code. Using “HTML Snippet” instead of “JavaScript snippet” avoids potential mistakes, such as accidentally nesting script tags.
Next, give your snippet a name that you’ll remember. Then, copy and paste the JSON-LD from the Schema Markup Generator Tool into the “Code Preview” field.

Now, scroll to the “Insertion” section. Select “Page Specific” to choose where you want schema to be added on the page.
Here, we chose “Insert After Content.”

Finally, add logic to have the schema snippet added to the page(s) where you want it to appear.
In the “Smart Conditional Logic” section, choose “Show” from the dropdown. Then, click the “+ Add new group” button.

Select “Where” > “Page URL” to apply the snippet on a specific page.
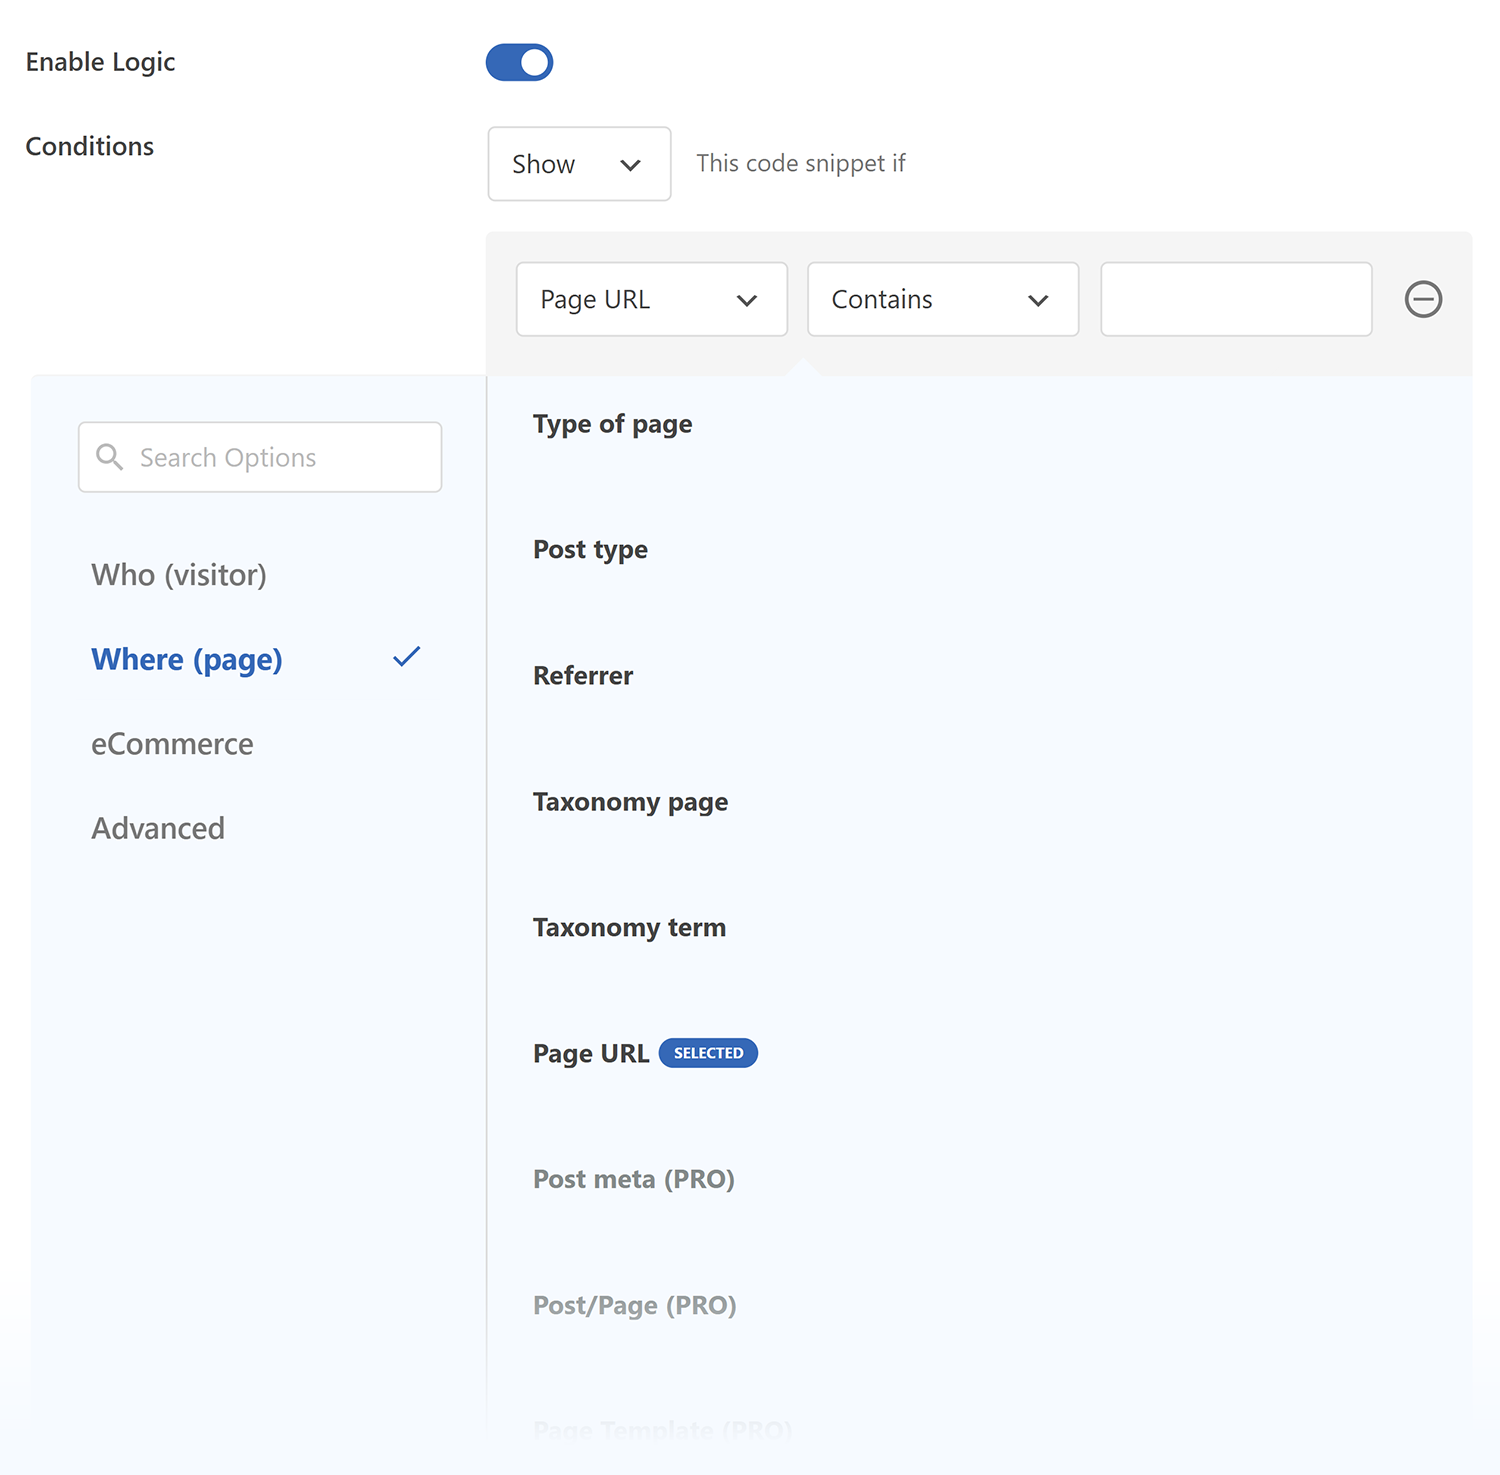
Make sure the condition dropdowns show:
- “Page URL”
- “Is”
- The full URL to the page where you want to add the snippet

Before leaving, make sure to scroll back to the top and select “Save Snippet” and switch the toggle from “Inactive” to “Active.”

Now, your schema should be live on the site you selected.
Step 3: Validate the live schema
It’s important to validate your schema once it’s live, even if you already validated it after generation.
First, make sure it’s appearing as expected:
- Visit the page where you added the schema
- View the page source code — CTRL+U (Windows/Linux) or Command+Option+U (Mac) on most browsers, or right click and use the context menu
- Search for the
@typeof the schema you added. For our Organization schema example, that would be"@type": "Corporation", since we chose the Corporation subtype. Be sure to include the quotation marks in your search.
If you don’t see the new schema, you may have forgotten to save or activate it. Go back and check all the options to make sure it’s implemented correctly.
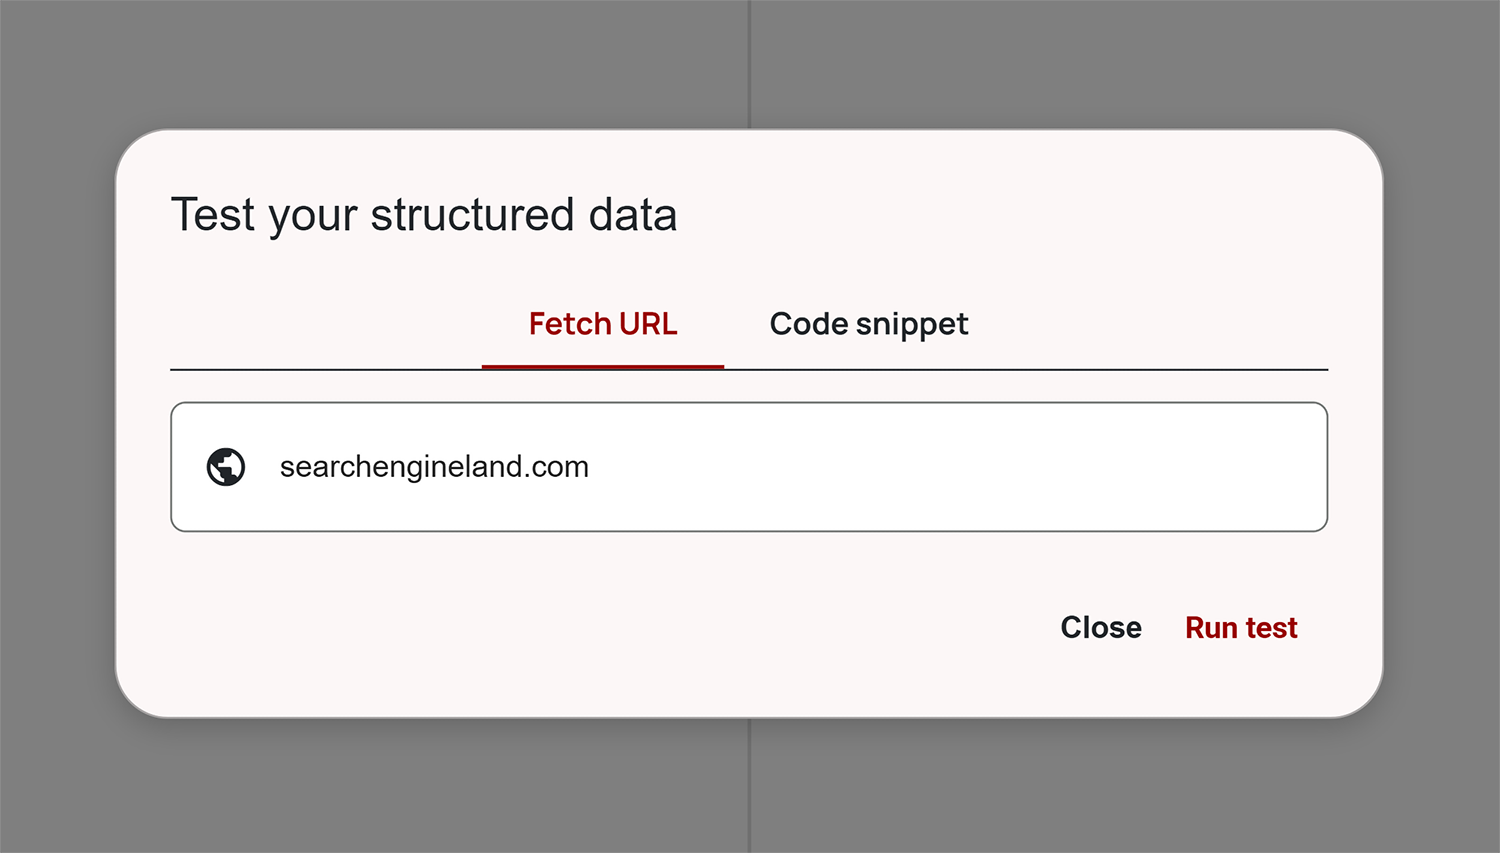
If you do see your schema, validate it using the Schema.org validator. Simply enter the URL to the page with the schema, then click “Run test.”
Fix any errors the validator reports. If there are no errors, you’re good to go!
Ready to markup your schema now?
Now that you know how to generate, add, and validate schema for your site, head up to the Schema Markup Generator Tool to get started.


