4 website actions you can track with Google Tag Manager
There are limitless actions you can track to improve data gathering. Here is a step-by-step guide with website actions important to digital marketing measurement.
Google Analytics offers a wealth of data via the default installation, but many actions aren’t tracked by default. Getting additional tracking in place often entails digging into technical documentation and working with backlogged development teams. Google Tag Manager can help fill in the gaps, expanding the activity you can track on websites while not requiring backend website access or coding knowledge.
In this article, I’ll walk through setting up GTM tracking for four website actions important to digital marketing measurement. If you haven’t yet set up GTM, start here to work through Google’s instructions for creating an account and adding the simple code snippets to your site. Once installed, you’re ready to start setting up some tags and triggers to obtain better insight about your users.
Form submissions
Ever needed to track a form that doesn’t go to a thank you URL after clicking submit? GTM includes a built-in form listener that identifies when a form submission takes place so you can fire a conversion tag.
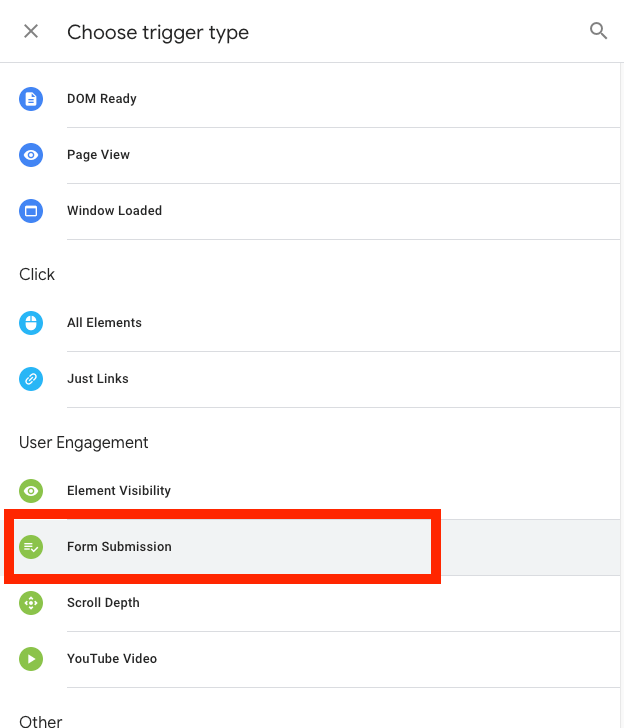
Start by creating a form submission trigger. Go to “Triggers” from the lefthand navigation and click “New” to start building a new trigger.

Next, choose “Form Submission” as the trigger type.
Now, you’ll see the options appear for customizing your trigger. First, checking the “Wait for Tags” button will ensure that the form doesn’t submit until any associated tags fire. Next, the “Check Validation” button will ensure the tag only fires if a form submission is successful.
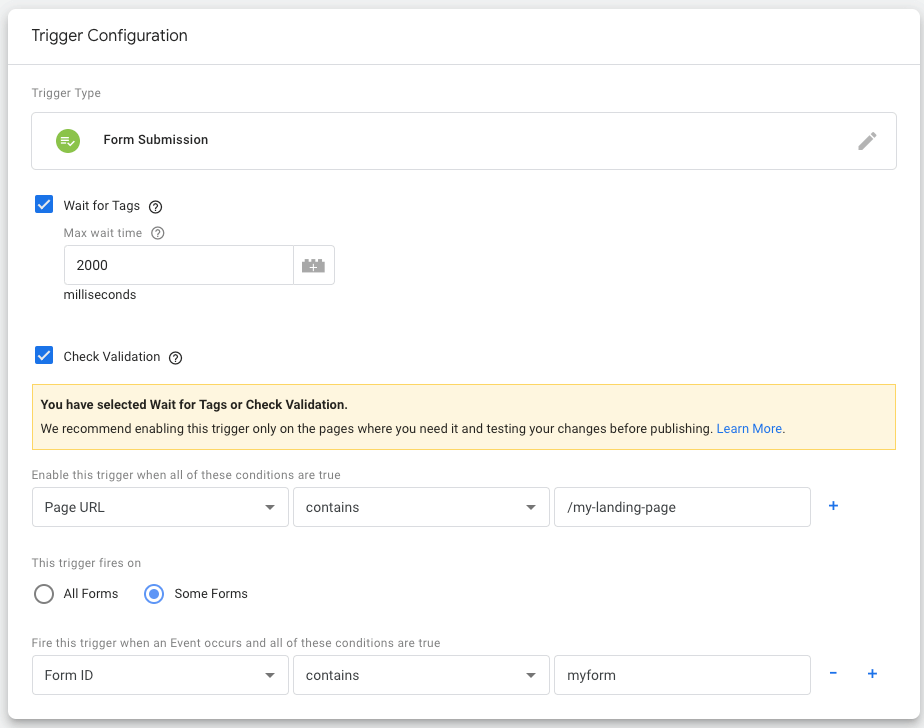
In the first dropdown under the checkboxes, you can choose when to enable the trigger. In this instance, we’ve chosen to enable it only for a particular landing page URL.
Finally, you can choose to fire the trigger for “All Forms” or “Some Forms.” This option is particularly helpful if you want to track multiple forms on the same page using separate conversion tags. For instance, you might have one form for downloading a whitepaper and another for contacting a salesperson.
Once again, you can choose from a wide array of variables to specify which form you want. In this instance, we’ve selected the “Form ID” (the HTML ID attribute associated with the form).
Finally, once you’ve saved the trigger, you can then associate it with the tags you’d like to fire when a form submits. These might include a Google Analytics event tag and ad platform conversion tags.
Note that this trigger won’t work with all forms, so you should use GTM’s preview mode to ensure that your tag is actually firing on a test submission. If the default form trigger doesn’t trigger, a couple potential alternatives are tracking a custom JavaScript event that’s set up to fire on form submission or tracking clicks on the “Submit” button.
Button clicks
GTM’s click trigger can track clicks on just about any website element you want. Some examples of button click actions to track include:
- Purchase links leading to third-party seller sites
- “Add to Cart” actions
- Links to social media profiles
- Click-to-call buttons
- Subscribe buttons
- PDF downloads
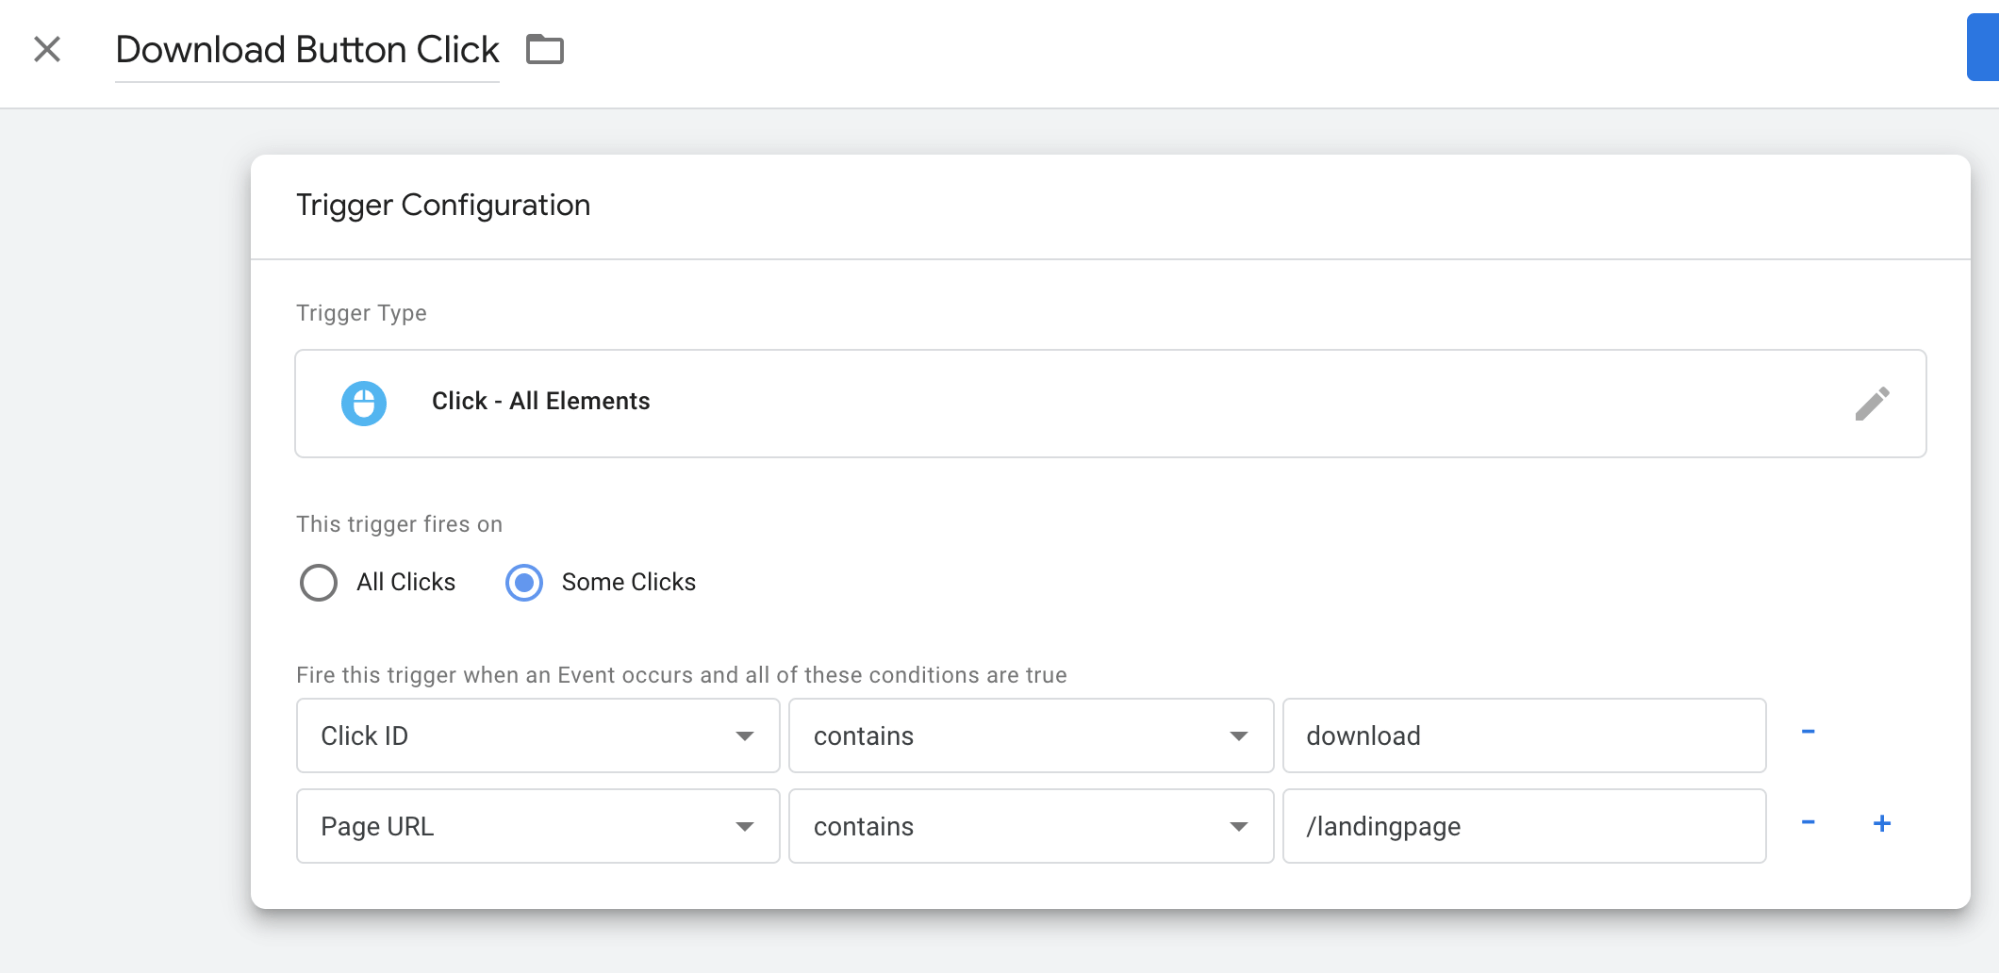
First, you’ll need to set up a trigger to pinpoint the click(s) you want to target. Next, you can set up event tracking to fire a custom event into Google Analytics when the click happens, or associate the click with an ad platform conversion tag.
Create a new trigger and select a trigger type of Click – All Elements. You can then specify which clicks to track using as many parameters as you’d like. For instance, you could track a Download button with a specific ID only on your landing page URL.
Finally, associate the trigger with the tag(s) you want to use for sending data back into Google Analytics, Google Ads or other platforms.
Video views
Every piece of user engagement on your site can offer clues to how interested visitors are in your content. If you include embedded YouTube videos on your site, GTM can track how many people choose to watch, along with watch time and when they drop off.
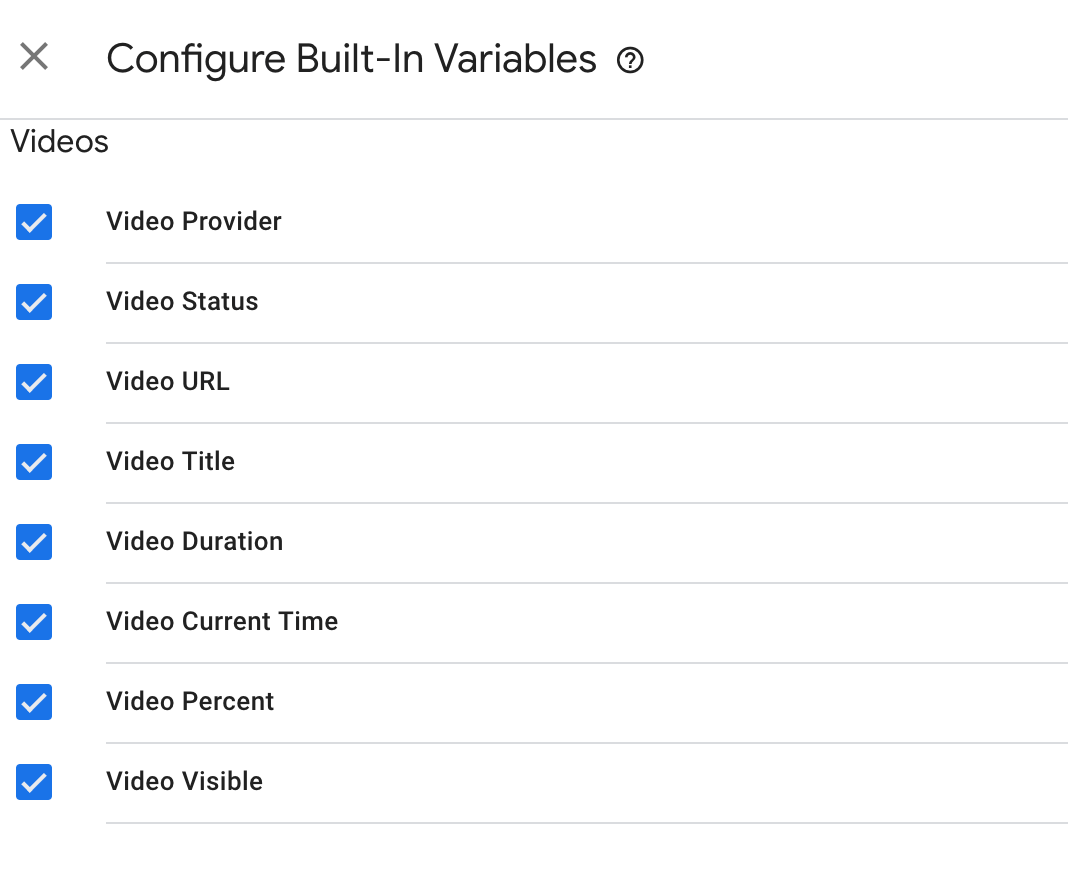
To set up video tracking, you’ll first need to enable a few variables that aren’t turned on by default. Within your GTM account’s workspace, select “Variables” from the left sidebar.
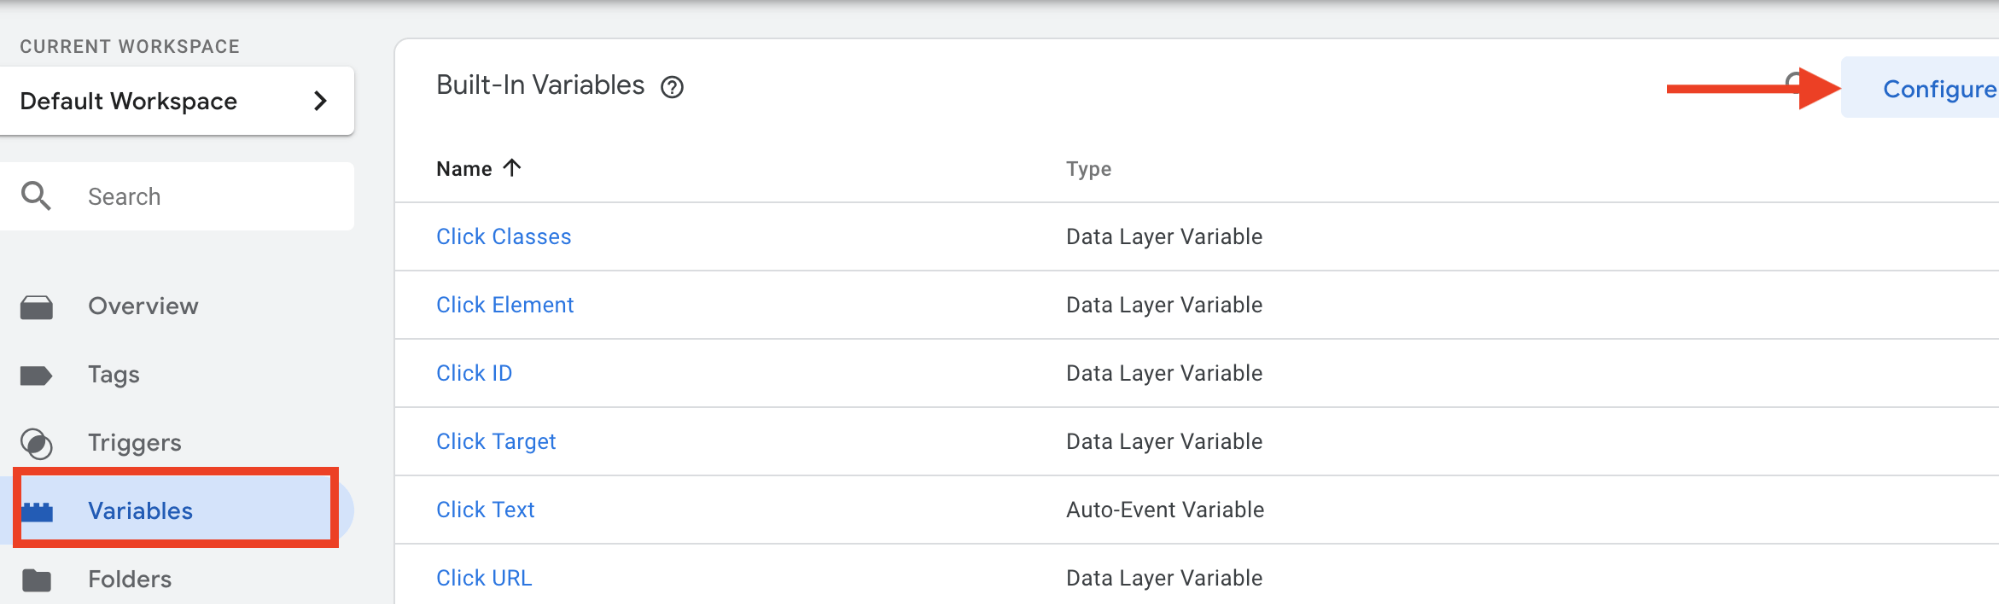
On the screen that appears, click “Configure.” Now, scroll down to the “Videos” section, and select the variables you’d like to track.
After choosing your variables, create a trigger with a YouTube Video trigger type. Now, select the action(s) you’d like to track. For instance, you might want to fire a Google Analytics event anytime someone starts or completes a video, or when they watch up to a certain point. At the bottom, you can choose to fire the trigger for all videos on your site or for select videos based on criteria you specify.
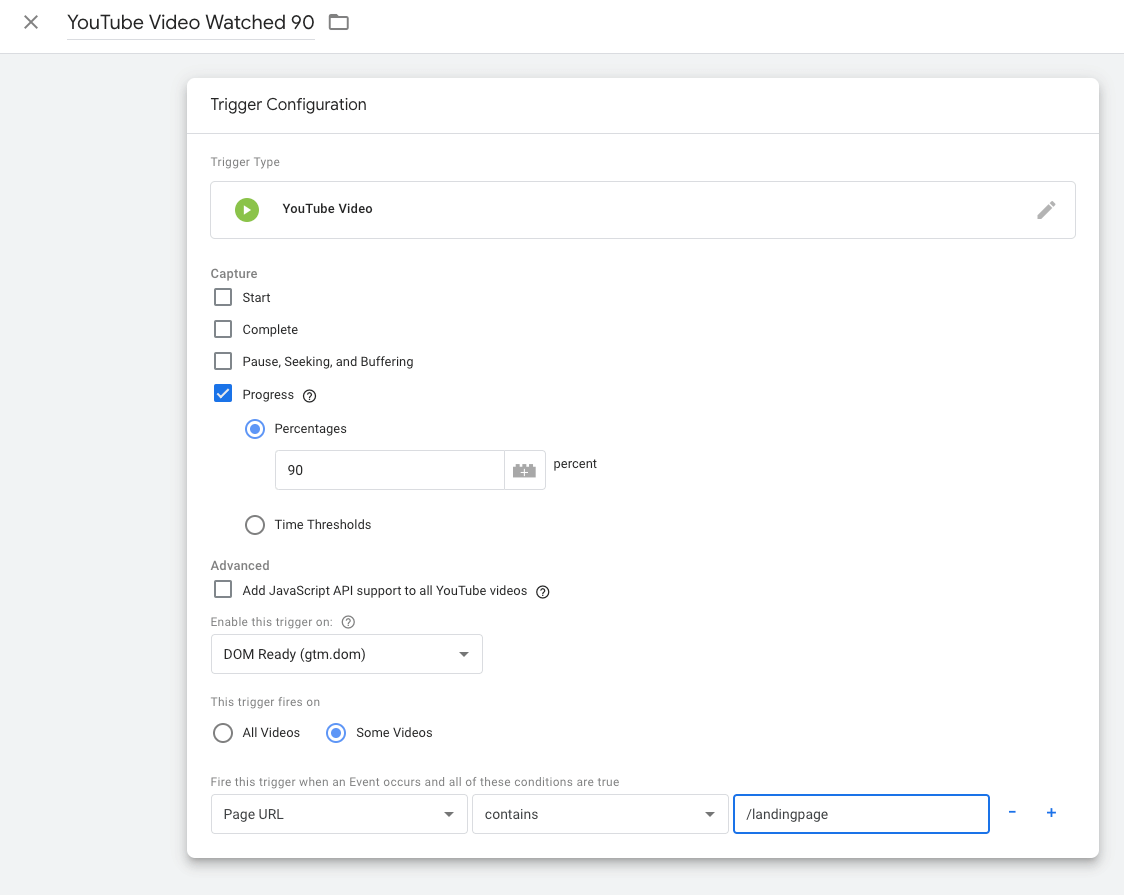
In this example, I’ve set up a trigger tracking any views of 90% or more for a YouTube video embedded within a landing page URL.
Next, I set up a Google Analytics tag with a “Track Type” of event, defining the parameters I’d like to fire into Analytics when the video is viewed at 90%.
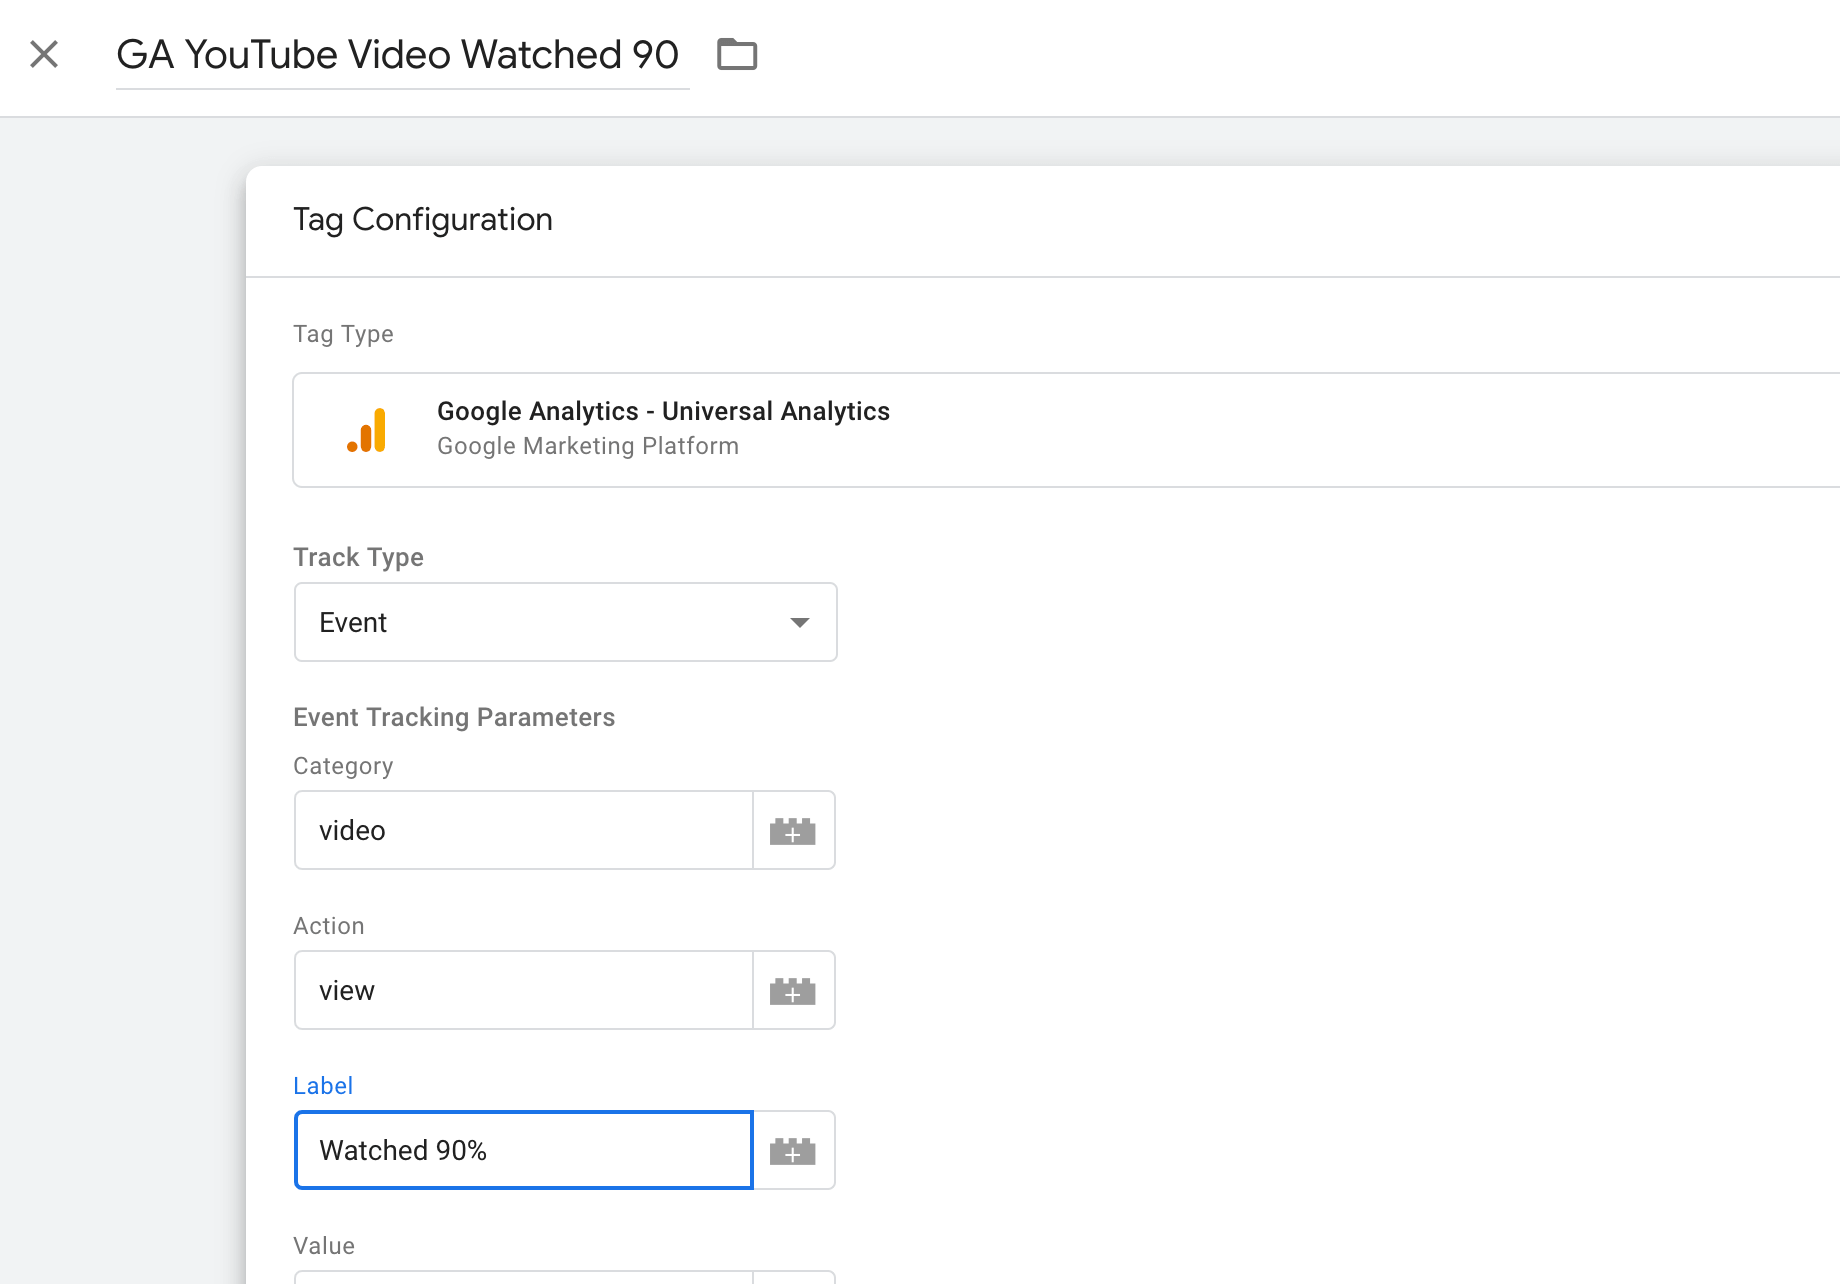
Finally, I’ll associate the tag with the previously created trigger, save, and publish.
For a more advanced setup that will fire events for all video-related actions via a single tag, see Simo Ahava’s excellent solution, which incorporates a custom variable.
Scroll behavior
Testing a long landing page and wondering how much of the “below the fold” information people view? Want to know how many people read your blog articles beyond the first few paragraphs? Scroll tracking can help answer these questions.
GTM contains built-in variables to track scrolling activity. Just as with the video variables, you’ll need to enable these before you can use them.
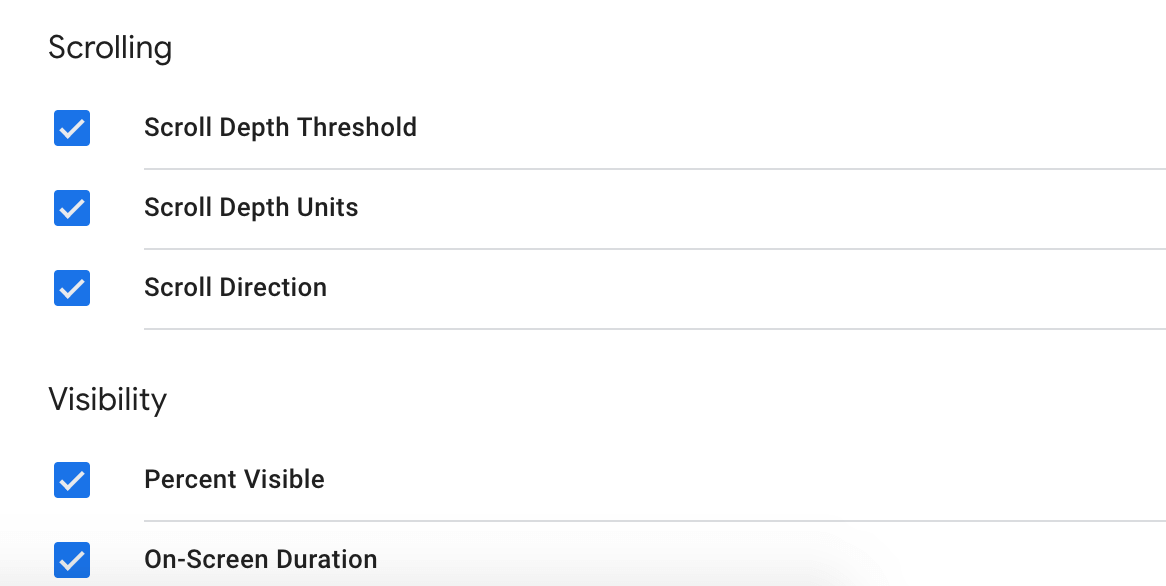
Under the Configure menu accessed from the Variables section, you’ll find the “Scrolling variables” toward the bottom of the list. You can also use the “Visibility variables” if you’d like to measure when a specific element was viewable on the page.
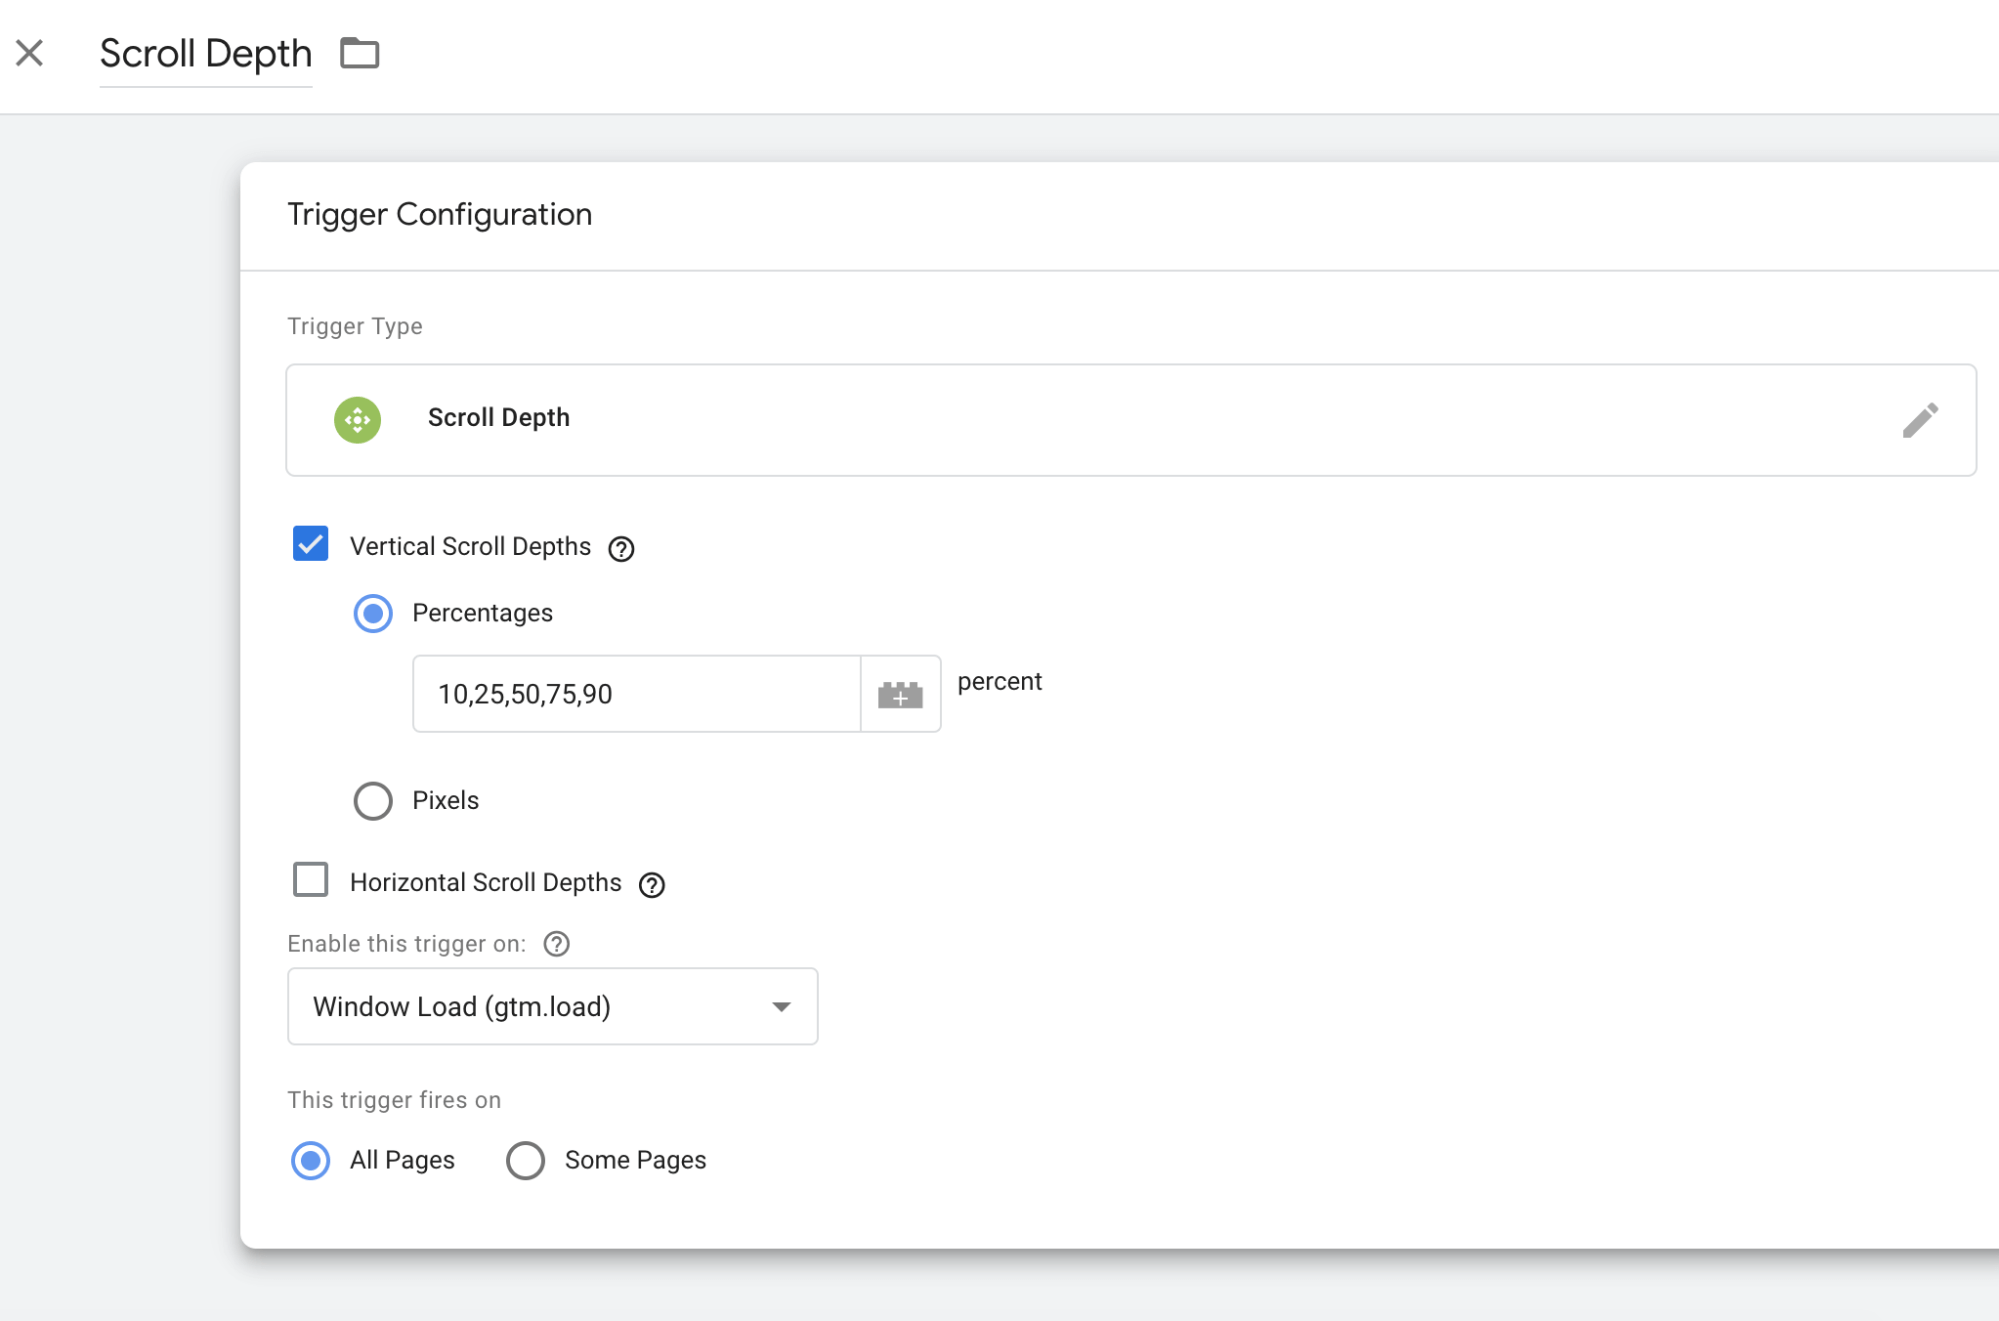
Next, set up a trigger with a type of “Scroll Depth.” You’ll see fields where you can specify the points on the page you’d like to track, either by percentage or pixels. You can supply multiple numbers separated by commas.
Once you’ve saved your trigger, create a Google Analytics tag with a “Track Type of Event.” Add in the event criteria you’d like to populate into your Analytics account.
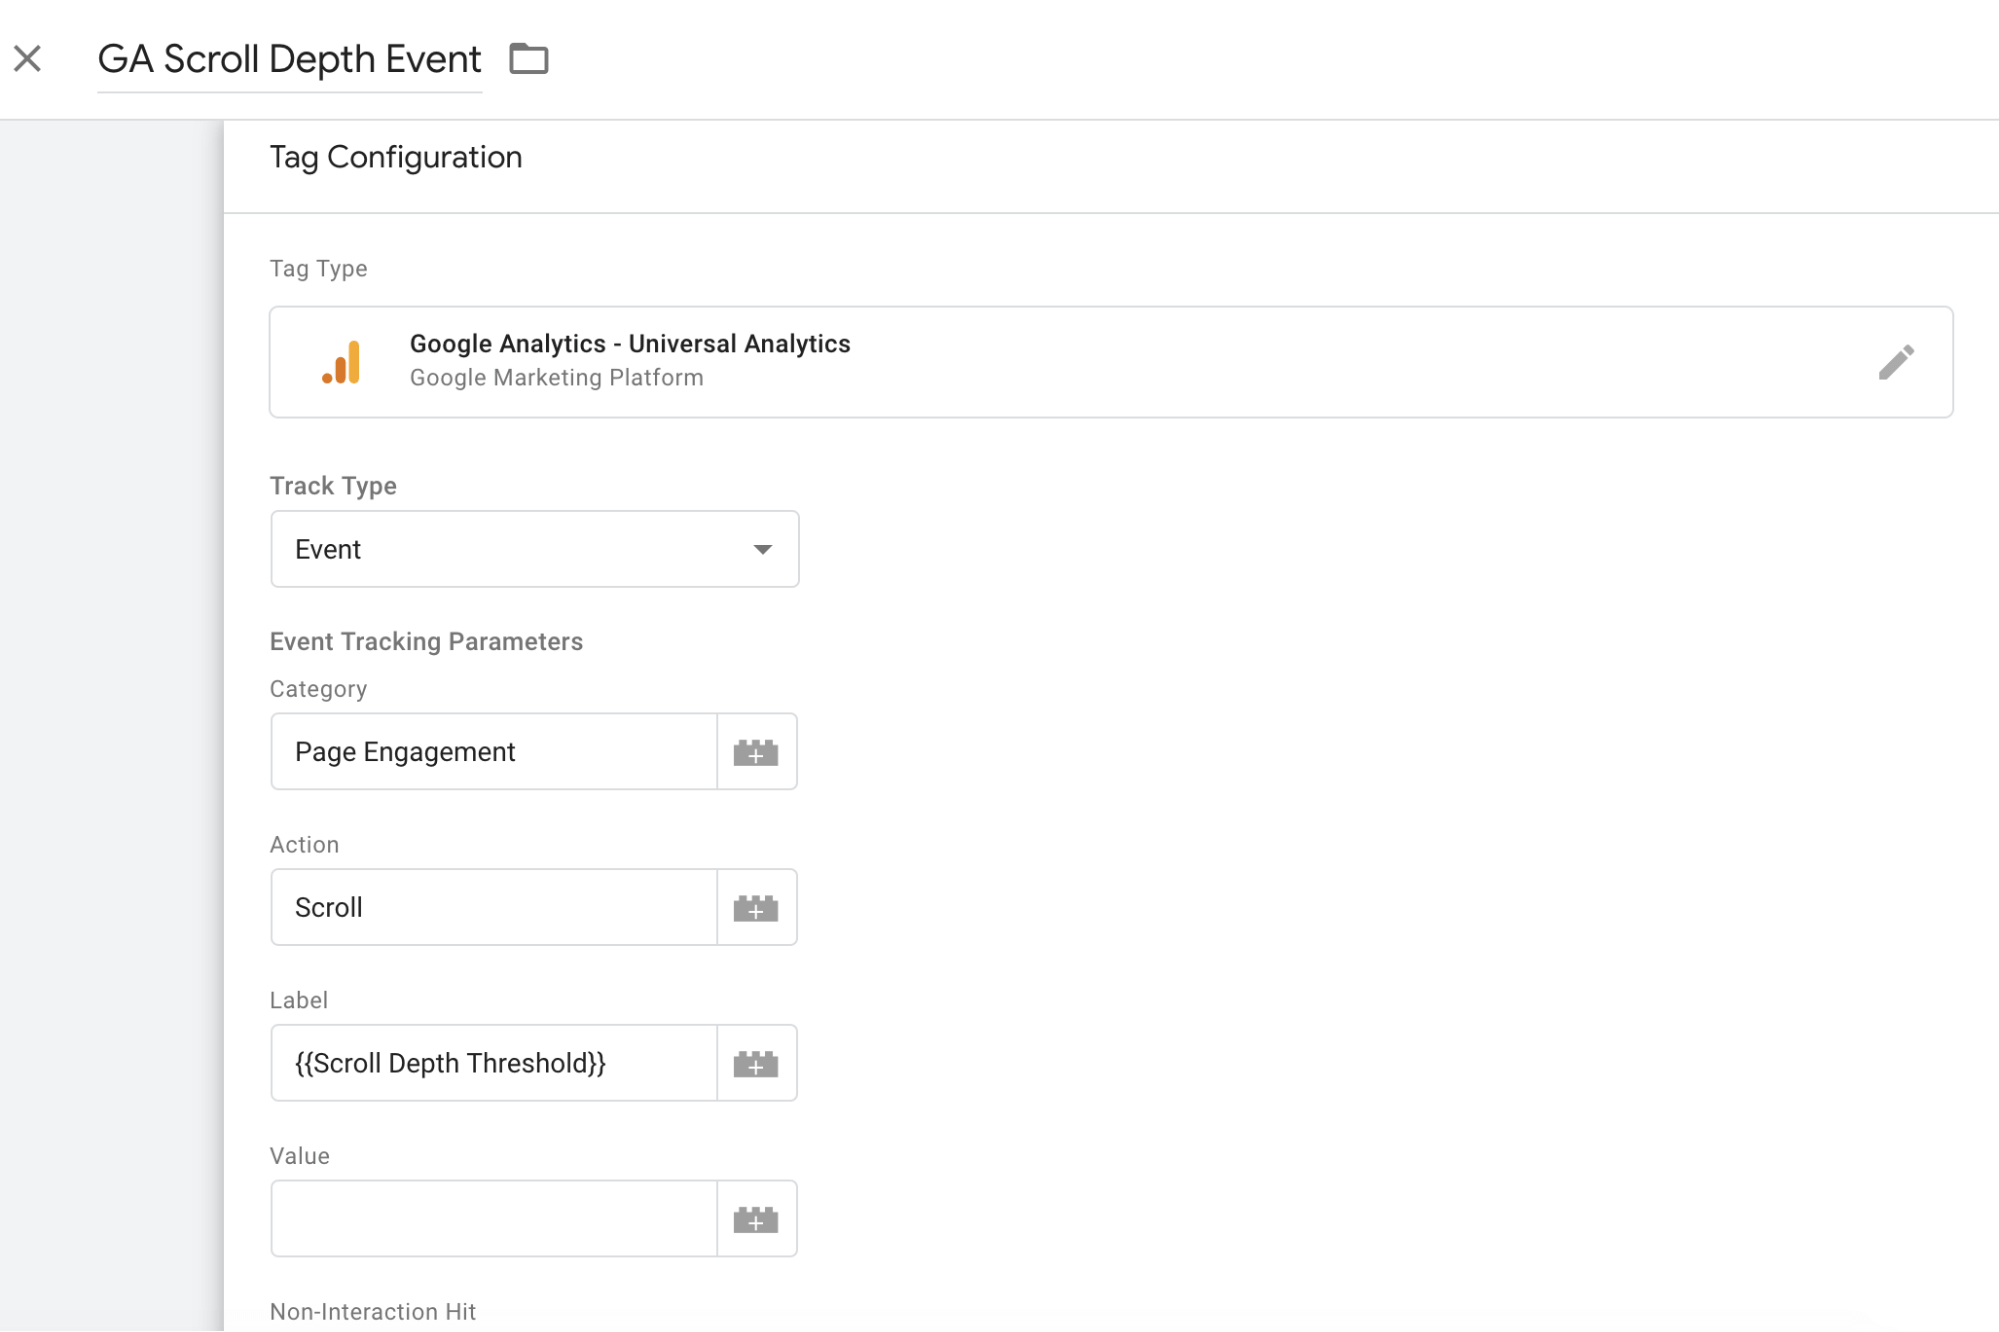
For this example, we’re using a dynamic variable for the label: {{Scroll Depth Threshold}}. This will auto-populate the depth to which a user scrolls on the page.
Finally, associate the “Scroll Depth” trigger you previously created and save the tag. You’re now ready to publish your scroll tracking setup!
Start tracking
I’ve provided four examples to get you started, but there are limitless actions you could track using Google Tag Manager. Take some time to browse through the tags, triggers, and variables and play with various configurations using the preview mode. You’ll be able to improve data gathering and make tracking setup easier when you take the time to develop a solid understanding of GTM.
Contributing authors are invited to create content for Search Engine Land and are chosen for their expertise and contribution to the search community. Our contributors work under the oversight of the editorial staff and contributions are checked for quality and relevance to our readers. The opinions they express are their own.
Related stories
About the author