The ultimate Google Search Console guide: Everything you need to know
Learn how to use Google Search Console to monitor site performance, fix indexing issues, and boost your SEO rankings with this step-by-step guide.
If you’re not tracking what’s actually happening on your site, you’re just posting and hoping for the best. But let’s be honest, that’s not really a strategy at all.
Enter Google Search Console (GSC), because great content can still fall flat if you don’t know how people are finding it, or where they’re dropping off. GSC is your behind-the-scenes partner, helping you with:
- Monitoring your website’s performance in Google Search
- Fixing indexing issues
- Uncovering keyword insights you wouldn’t otherwise see.

It’s what turns your SEO guesswork into a clear strategy rooted in real data on your site’s performance.
We’ll walk you through exactly how to set up and verify your site, make sense of the key reports, and start using GSC to improve your SEO, without the overwhelm.
What is Google Search Console and why does it matter for SEO?
GSC’s purpose and its role in SEO
Part of the success of your digital marketing efforts comes down to one key relationship: your website and Google. The better they get along, the more visibility, traffic, and results you’ll see. Google Search Console (GSC) is the tool that helps make that relationship thrive.
Why?
Because it lets you see exactly how your website is appearing, and performing, in Google Search.
The best part?
It’s completely free. And it’s designed to support you no matter your expertise level. You could be a blogger, a small business owner, or an SEO nerd. As long as you run a website, you’re good to go.
The beauty of GSC is that it doesn’t just show you what’s happening on your site, it shows you how people are finding it. That includes things like which pages are getting clicks, whether they’re ranking high or low in search results, and sometimes even why your search appearance may vary.
With this tool, you can check if Google is indexing your pages properly, if there are any issues holding them back, and how to fix those issues to help your content show up for more people. So instead of flying blind, you’re making informed decisions based on how Google itself is interpreting your site.
Because of that, you get more out of every bit of effort you’re putting into your SEO strategy. You can optimize your content more effectively, catch and resolve problems early before they hurt your rankings, and get real insights into what’s actually driving traffic to your site, so you can double down on what’s working.
How GSC differs from tools like GA4 and Looker Studio

Google Search Console, Google Analytics, and Looker Studio (formerly known as Google Data Studio) all have one thing in common: Google. But they’re actually quite different, and the differences really complement one another when it comes to your website’s success.
The SEO toolkit you know, plus the AI visibility data you need.

Let’s break it down:
- Google Search Console (GSC) focuses on how people find your website through Google Search. It’s all about search visibility; things like search terms and rankings. It tells you what search terms led people to your site and how you’re performing in search, even compared to other websites.
Example: Let’s say you run a herbal tea blog. If 300 people search “best herbal tea,” GSC will show you if your blog appeared in those results and how many people chose to click on your site based on those search terms.
- Google Analytics (GA4) tells you what happens after someone lands on your site. It tracks user behavior, how long they stay, which pages they visit, what actions they take, and what leads to a conversion. This helps you understand what content is keeping people interested and what might need improving.
Example: Out of the 25 visitors who clicked through from the herbal tea search, GA4 might show that 10 people stayed for five minutes while the rest bounced after 10 seconds. It might also show that a few signed up for your newsletter or clicked “Buy Now.”
- Looker Studio takes data from both GSC and GA4 and turns it into easy-to-read charts and reports in one dashboard. Think of it like a digital bulletin board where all your key metrics are beautifully laid out, so you can see the story at a glance.
Example: Let’s say you want to report on how your herbal tea blog is performing. Instead of jumping between GSC and GA4, Looker Studio lets you see that “best herbal tea” brought in 300 impressions and 25 clicks (from GSC), and that 10 of those visitors stayed on your site for more than five minutes and three signed up for your newsletter (from GA4).
Why it matters: Visualizing the data makes it easier to interpret. You can spot trends faster, communicate results clearly, and make smarter decisions about where to focus your time and energy.

How to set up and verify your website in Search Console
Step 1: Go to Google Search Console
To set up GSC, you’ll need a Google account and access to your website.
Go to https://search.google.com/search-console

Step 2: Add a new property
When you open Google Search Console for the first time, you’ll be asked to add a property. This simply means you’re telling Google which site you want to track.
There are two ways to do this:
- Add a Domain Property (recommended)
- Add a URL Prefix Property (more specific)
Let’s walk through both, one step at a time.
Option 1: Add a Domain Property (Recommended)
This gives you a full view of everything happening on your site, across all pages, subdomains (like blog.example.com), and even different protocols (http, https, etc). It’s the most complete option.
Note: If you go with this option, you’ll need to verify ownership through your domain provider (like GoDaddy, Namecheap, etc). Don’t worry, we’ll show you how.
Here’s how to add a Domain Property:
- In the Domain section, type your domain without
http,https, orwww.
Example: just typeexample.com(not https://example.com)
Then click “Continue.”

- You’ll now see a dialog box with a TXT record, a bit of code you’ll copy and add to your domain settings.
Click “Copy” to copy the TXT record.
- In a new browser tab, log into your domain registrar.
(For example, GoDaddy, Google Domains, etc.) - Once logged in, head to your DNS settings.
In GoDaddy:

- Click the nine dots next to your business name
- Select “Domains”

- In your domain list, click the three dots beside your site name and select “Edit DNS”

- In the DNS Management window, click “Add” in the “DNS Records” section

- Fill in the fields in the pop-up like this:
- Type: TXT
- Name: @
- Value: paste the TXT record you copied from Google
- TTL: 1 hour


Note: Leave the TTL (Time to Live) at its default value—usually one hour. DNS changes can take time to fully update across the internet, so verification may take anywhere from a few minutes to 48 hours. Don’t worry if it doesn’t work right away—that’s completely normal.
- Click “Add Record” when you’re done


- Go back to Google Search Console and click “Confirm” (or “Verify” if this is your first time)

If you see a message saying “Ownership not verified yet,” that’s okay. Sometimes it takes a few minutes to update.
We’ll cover this more in the next step.
Option 2: Add a URL Prefix Property
If you only want to track a specific section of your site (like www.example.com/blog), you can choose the URL prefix option instead.
This method also offers more flexible ways to verify your site; HTML file, tag manager, Google Analytics, etc.
Here’s how to add a URL prefix property:
- Under the URL prefix section of the first page of GSC, type the full URL of the site or section you want to track.
Example: https://www.example.com/blog
Then click “Continue.”
- Google will show you several ways to verify your property:

- HTML file upload (recommended)
- HTML tag
- Google Analytics
- Google Tag Manager
- Domain name provider

Try Google’s recommended method: HTML file upload.
- Expand the “HTML file” section and click to download the verification file

- Upload this file into your website’s root directory:
- If you want to verify www.example.com, upload it to the homepage directory
- If you’re verifying www.example.com/blog, upload it into the blog folder
This tells Google, “I own this part of the site!”
- Once the file is uploaded, go back to Search Console and click “Confirm” or “Verify“

It might take a bit of time for Google to confirm your ownership. If it doesn’t work right away, that’s totally normal.
We’ll explain how to fix that in the next step.
Step 3: Verify Your Ownership
Once you’ve added your property in Google Search Console (whether by domain or URL prefix), the next step is to prove that you actually own the site. This is Google’s way of keeping things secure; it won’t show sensitive performance data to just anyone.
The way you verify your site will depend on the method you chose in step two.
If you added a Domain Property:
This uses DNS verification, which means you’ll prove ownership through your domain provider (like GoDaddy, Google Domains, etc.).
You should’ve already copied the TXT record and added it to your DNS settings in step two. Now it’s time to confirm it worked!
- Go back to Google Search Console
- Click the “Verify” or “Confirm” button
You’ll see one of two messages:
- Success: You’re verified. Google will now start collecting data for your site (this can take a few hours to a few days).
- Ownership not verified yet: Don’t panic! It might take a few minutes or even up to 48 hours for DNS changes to update.
If it’s not working yet, give it time and come back later. You don’t need to redo everything; just try again after a few hours.
If you added a URL Prefix Property:
You’ll verify using one of Google’s supported methods. These are your options:
- HTML file upload (recommended)
- HTML tag
- Google Analytics
- Google Tag Manager
- Domain name provider
Let’s walk through the HTML file upload method (the one we used earlier):
- Make sure you’ve uploaded the verification file to your site’s root directory
- Go back to Google Search Console
- Click “Verify” or “Confirm“
Just like with the domain method, you’ll either get a success message or a little delay.

If your verification doesn’t go through:
- Double-check that the file is in the right folder
- Make sure the file name hasn’t changed during download/upload
- Wait a few minutes and try again
Once your site is verified, Google will begin collecting data about how people find and interact with your website.
Owners, users & permissions in Google Search Console
In Google Search Console, people can have different levels of access depending on their role. These roles decide what someone can view or change in your account.
There are three main roles: Owner, User, and Associate. We’ll dive into what each entails.
Owner
An owner has full control of your Google Search Console property. They can:
- Add or remove users
- Change settings
- View all reports
- Use all tools
There are two types of owners:
- Verified Owner: This is someone who has proven they own the website through using a verification method, like uploading a file or adding a code to the site.
- Delegated Owner: This person didn’t do the verification themselves. Instead, a verified owner gave them access and made them an owner too. (They still have full access, just like a Verified Owner.)
User
A user can access the Search Console but with fewer permissions than an owner. There are two types of users:
- Full User:
- Can view most of the data
- Can take some actions (like submitting URLs or viewing reports)
- Restricted User
- Can only view some data
- Can’t make changes or take action
Associate
An associate can’t open or use your Search Console account directly, but they might have limited abilities based on how they’re connected. For example, if you link Search Console with YouTube or another Google service.
How to add a new user
If you’re an owner, you can give other people access to your website’s Search Console account. Here’s how:
- Go to your property in Google Search Console
- In the left-hand menu, click on “Settings”
- Select “Users and permissions”

- Click the “Add user” button

- Type in the person’s email address
- Choose their permission level: Full or Restricted
- Click “Add”

The person you added will now get access to your property based on the role you gave them.
Pro tip: Only give Owner access to people you absolutely trust. Owners can make major changes, including removing other users or deleting the property.
How to add a sitemap to Google Search Console
A sitemap is a file that lists all the important pages on your website, the ones you want Google to crawl (visit) and index (add to search results).
Google will eventually find your pages on its own, but submitting your sitemap directly through Google Search Console can speed things up, especially for new sites or recently updated pages.
How to submit your sitemap
- In your Google Search Console dashboard, look at the left-hand menu
- Click on “Sitemaps”

- Under “Add a new sitemap,” type in your sitemap URL
For example, most WordPress websites use:sitemap.xmlso your full URL might look like:https://www.example.org/sitemap.xml - Click “Submit”
What Happens Next?
Once Google processes your sitemap, you’ll see a message that confirms the status.

If your sitemap has been accepted, that means Google is now aware of all the key pages you want it to crawl and index.
To double-check if your sitemap is working well, you can run a crawl-based audit of your website using a tool like Semrush or Ahrefs.
Here’s how:
- Set up a new project in the SEO tool
- Start a crawl of your website
- Once the audit is done, head to the “Issues” tab
- Type “sitemap” into the search bar

The tool will highlight any sitemap-related problems and give suggestions on how to fix them, like broken URLs or pages that shouldn’t be indexed.
Understanding the GSC interface: Reports that matter
Now that you’ve set up Google Search Console, added users, and submitted a sitemap, let’s explore the reports and tools it offers. These help you understand how your site is doing on Google and what to improve.
Performance report
This report shows how your site is performing in Google Search. You’ll see four key metrics:
- Total clicks: How many people clicked on your site from search results
- Total impressions: How many times your site showed up in search
- Average CTR: The percentage of impressions that turned into clicks
- Average position: Your average rank in search results
To open it, click “Search Results” in the left-hand menu.

Below the chart, you’ll see a table showing:
- Which queries brought people to your site
- Which pages are performing best
- Traffic by country and device
- Extra insights like page experience and daily clicks

Tips for improving your performance:
- Low CTR: Improve your title tags and meta descriptions to make your listings more inviting
- Missing keywords: Create new content around the terms you want to rank for
If your site appears in Discover or Google News, you’ll also see separate reports for them.

URL Inspection tool
This tool helps you check the health of individual pages on your site.
To use it:
- Click “URL Inspection” in the left-hand menu
- Or paste your full URL into the top bar and press “Enter”

You’ll see:
- Index status: Whether or not the page is indexed
- Last crawl date: When Google last visited the page
- Mobile usability: If the page works well on mobile
- Structured data: If your page has structured data and whether it’s working properly

You can also test how Google sees your page in real time:
- Click “Test Live URL”

- Then click “View Tested Page” to review how it looks

Need Google to index a new page faster?
- Paste the URL into the inspect bar
- Press “Enter”
- Click “Request Indexing”

Page Indexing report
This report shows which of your pages Google can index and which it can’t.
To access it, click “Indexing > Pages” in the left-hand menu
You’ll see a summary of indexed vs non-indexed pages

If you see a sudden drop in indexed pages, something might be wrong. Look at the reason column for details.

Common issues include:
- Not found (404) errors
- Pages with a noindex tag
Click on a reason to see the affected URLs.

At the top, you’ll find a link with help on how to fix it.
After fixing the issue, click “Validate Fix” to let Google know.

Sitemaps report
This report shows the sitemap files you’ve submitted and whether there are any issues.
To open it, click “Sitemaps” in the left-hand menu

You’ll see:
- URL: The sitemap URL
- Type: XML, RSS, etc.
- Submitted: When you submitted it
- Last read: When Google last checked it
- Status: Whether the crawl was successful
- Discovered pages: How many pages Google found

Make sure the status shows “Success.”
If not, here’s what the error messages mean:
- Has errors: There are issues in your sitemap. Open the details and follow Google’s suggestions.
- Couldn’t fetch: GSC couldn’t access your sitemap. Try a Live URL Test in the inspection tool to troubleshoot.
Clicking on a sitemap entry shows a detailed report.

Click “See Page Indexing” to check if those pages are indexed.

Page Experience report
This report tells you how user-friendly your pages are, based on things like speed, mobile usability, and security.
To open it, click “Page Experience” in the left-hand menu

You’ll see results split into “Mobile” and “Desktop” tabs.

Google measures page experience using:
- Core Web Vitals: How fast your pages load and how stable they feel when scrolling
- Mobile Usability: Whether your pages are easy to use on mobile
- HTTPS: If your site has a secure connection (important for trust)
Check the percentage of “Good URLs;” this shows how many of your pages offer a smooth user experience.
If there are issues, click into each section to explore.

Core Web Vitals fixes are often technical. If you’re not familiar with things like CSS or JavaScript, it’s a good idea to ask a developer for help.
Once you’ve fixed the issue, click “Validate Fix” at the top to let Google know.

Manual Actions report
This report shows if Google has penalized your site for violating its spam policies, things like keyword stuffing or unnatural links.
To open it, click “Manual Actions” in the sidebar
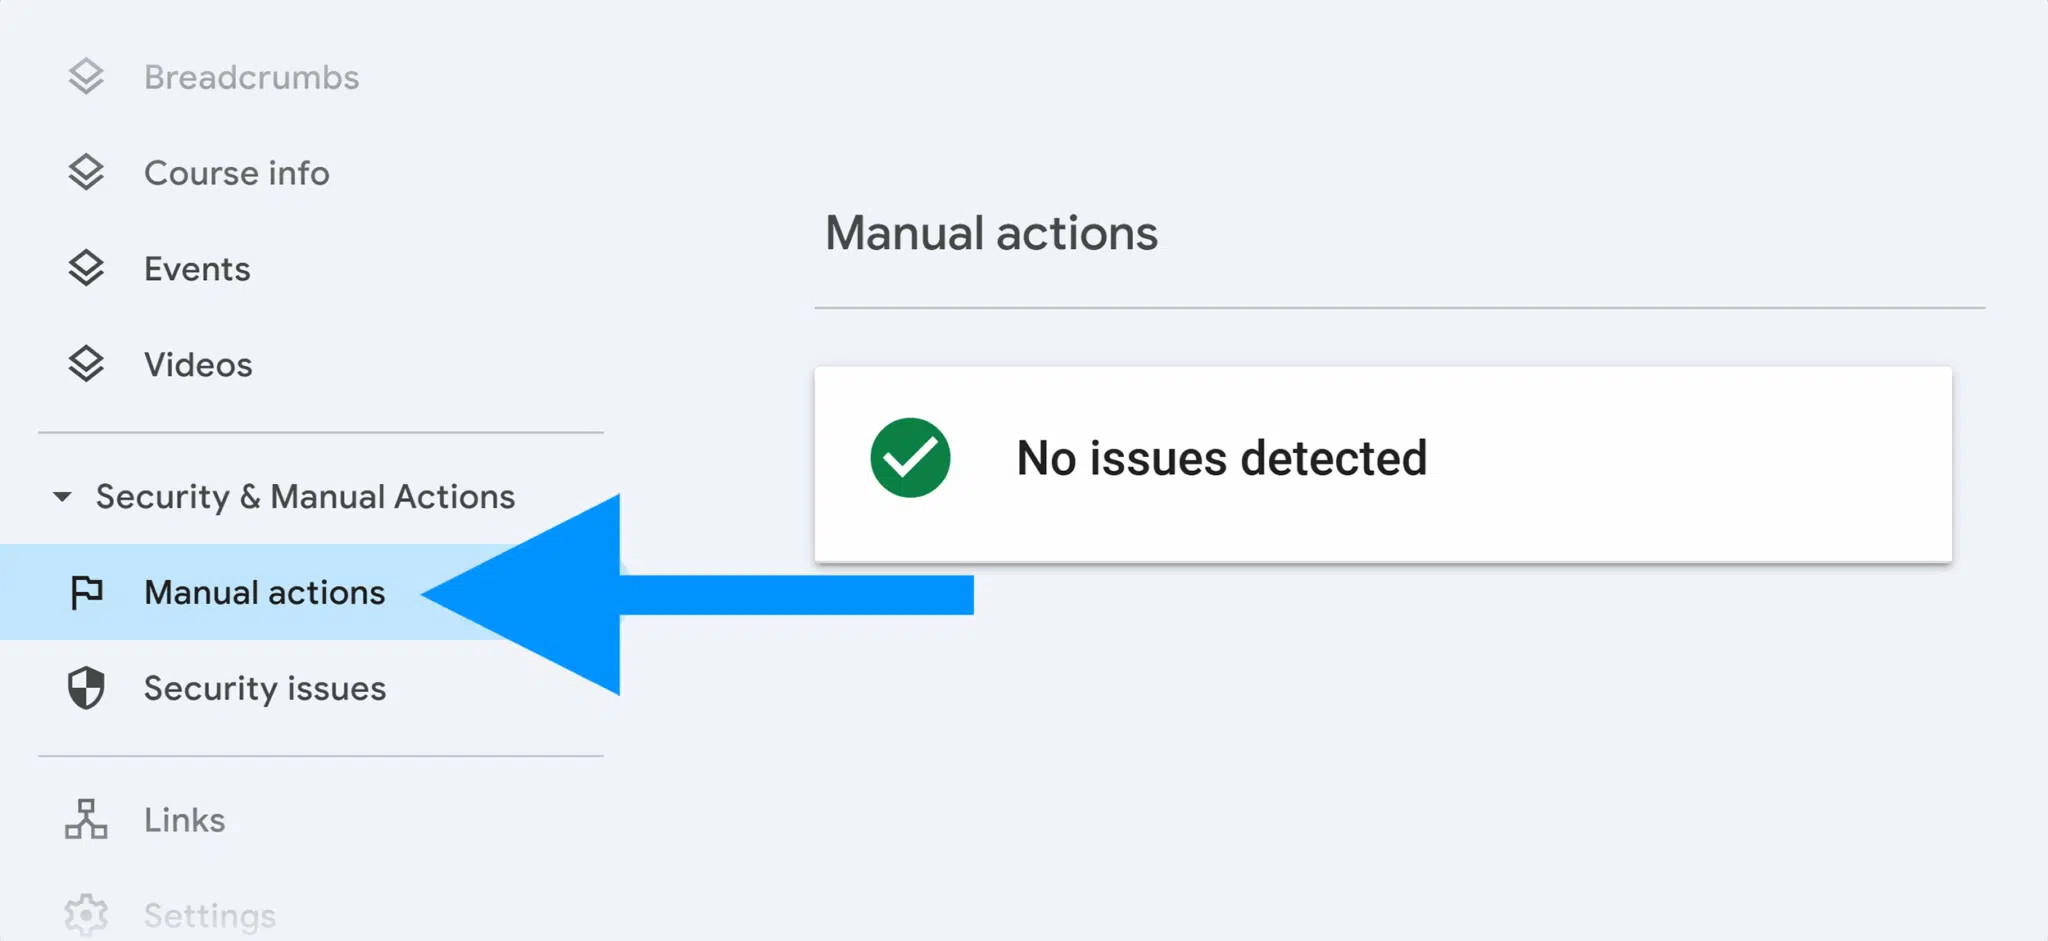
If you see “No issues detected,” you’re in the clear.
But if Google has taken manual action against your site, it will be listed here. Manual actions can stop your site from ranking, so they need to be fixed right away.
To recover, follow the steps in Google’s Manual Action Guide.
Links report
This report helps you see who’s linking to your site (external links or backlinks) and how your internal links are set up.
To open it, click “Links” in the sidebar.

At the top, you’ll see “Total” backlinks: Links from other websites to yours.

Below, you’ll find:
- Top-linked pages: The pages on your site with the most backlinks

- Top linking sites: Other websites that link to you most often

- Top linking text: Common anchor text people use when linking to your site

You’ll also see a section on internal links, which are links between pages on your own website. These help Google crawl your site and pass authority to different pages.
Check:
- Which pages have the most internal links
- Where you might want to add more links for SEO
Enhancement reports and Core Web Vitals
Enhancement reports
These reports show if Google has detected any structured data on your website and whether it’s working properly.
Structured data helps Google understand your content better and can lead to rich results (like star ratings, breadcrumbs, or product info) in search.
To access them look under the “Enhancements” section in the sidebar:
You’ll see one report for each type of structured data. For example, if you’ve added breadcrumbs, click “Breadcrumbs” to see its report.

Each report shows:
- How many valid items were found
- How many invalid (broken) items need fixing
If you see 0 invalid items, you’re all set!
But if there are errors, your rich results won’t appear in search. Click on the issue to see:
- The affected URLs
- What went wrong
- How to fix it
After fixing the errors, click “Validate Fix” to let Google check again.
Shopping reports
If your site sells products or includes product reviews, and you’ve added structured data, Google may generate Shopping reports for you.
You’ll see one or more of these:
- Product snippets: Shows if product markup is working in search
- Merchant listings: Checks data for free listings on Google Shopping
- Shopping tab listings: Reviews your listings for Google’s Shopping tab

Each report shows how many valid and invalid items you have.
If anything is marked invalid, those products won’t appear properly in Google results.
To fix them:
- Click on the error to see which pages are affected
- Adjust your structured data markup
- Use Google’s Rich Results Test to check your fix
AMP report
Accelerated Mobile Pages (AMP) is a way of building pages that load faster on mobile. If your site uses AMP, Google will show a special report.
To open it, click “AMP” in the left-hand menu.
You’ll see:
- Valid pages: AMP pages that work correctly and appear in search
- Invalid pages: AMP pages with issues that stop them from being indexed
Scroll down to see what’s broken and which pages are affected.
AMP issues are usually technical, so you may need a developer’s help. Once fixed, click “Validate Fix” to ask Google to recheck.
10 use cases for GSC vs GA
These are everyday ways Google Search Console gives you SEO insights you simply can’t get from GA4 alone. Let’s unpack them.
1. See which queries drive organic traffic
People are Googling things that matter to them. Let’s say someone is craving chocolate cake, and they search for “best chocolate cake” recipes. A bunch of results pop up, and maybe one of them is from your blog.
Now here’s where GSC is magic.
It actually shows you what people typed into Google that led them to your site. So instead of just knowing that people arrived, like you would in Google Analytics, you can see how they got there.
Without GSC, you’re just guessing. You know people landed on your site, but not what search brought them there. And that’s huge, because once you know what’s working, you can keep doing more of it.
2. Track average ranking position by page and keyword
You know when you search for something and you hardly ever go past the first page?
That’s most people.
If your content is showing up on page four or five, it’s basically invisible, even if it’s really good.
GSC helps you see where your site is actually ranking in search results. Not just overall, but by page and by keyword. So you’ll know which pages are doing well and which ones need a little help to move up.
This is something GA4 can’t really give you. GA4 shows you what happened after someone landed on your site, but not where you ranked, or what keywords got you there. GSC lets you see the full picture, from the search all the way through to the click.
3. Identify indexing issues and crawl status
You spend so much time creating content for your site, but sometimes, even with all that effort, a page might not appear in Google Search. And when that happens, it’s frustrating, because it means people can’t find the content you’ve worked so hard on.
That’s where GSC swoops in.
It helps you spot exactly which pages aren’t indexed and tells you why. It could be a noindex tag, a server error, or something else, but either way, you’ll know. GA4 doesn’t offer this insight.
Without GSC, you could be in the dark for months, wondering why traffic is low.
With it, you can fix things early and make sure your site is visible when people are searching.
4. Submit URLs for indexing
So let’s say you’ve gone back to update an old blog post. You’ve added new information, cleaned up the structure, and made sure it’s relevant for today. Now you want Google to notice these updates.
Instead of waiting for it to maybe re-crawl your site weeks later, you can go into GSC and manually ask Google to re-index that page. It’s like a polite little tap on the shoulder, saying, “Hey, I’ve updated this; please come look!”
GA4 doesn’t let you do that at all. So if you’re refreshing your content without GSC, you’re doing all that work without any guarantee it’ll be seen again anytime soon.
5. Monitor mobile usability and Core Web Vitals
Not everyone is viewing your site from a desktop.
Most people are on their phones, scrolling while they wait in queues or lie in bed. If your mobile site is glitchy, loads slowly, or the buttons don’t work, they’ll bounce.
GSC helps you catch all of this early. It tells you whether your pages are fast, if elements are shifting around while loading, or if something’s breaking on mobile. That matters because Google takes all of that into account when deciding whether to show your site in search.

GA4 doesn’t flag these technical issues. So without GSC, you could be unintentionally turning people away before they even read a word.
6. Detect manual actions and security issues
Sometimes, things go wrong behind the scenes. Maybe your site gets hacked, or Google detects unnatural links pointing to it. If that happens, you might get hit with a penalty, or worse, completely disappear from search–but GSC will notify you.
It might not send an email, but you’ll see a clear warning inside your dashboard.
It flags manual actions and security issues, so you can fix them before they become major problems. GA4 won’t warn you about this. So while it might seem like everything’s fine, in reality, your site could be struggling with problems you can’t even see.
GSC acts like a security checkpoint, helping you stay one step ahead.
7. Measure rich results and structured data coverage
You know when you search something on Google and instead of a plain old link, you see a recipe card, a star rating, or even FAQs neatly displayed?
That’s called a rich result, and it makes your content look extra special in search.
Now, to get that magic, you need to add something called structured data to your website. Think of it like giving Google extra notes about your content so it knows exactly what you’re offering, and can dress it up properly in search results.
But here’s the thing, even if you’ve added this data, it doesn’t always mean it’s working. That’s where GSC comes in. It lets you check if your structured data is actually being read and if there are any issues stopping your content from showing up in those beautiful rich formats.
GA4 can’t help with this. It won’t even let you know if your structured data is broken or invisible to Google.
GSC, on the other hand, shows you which types of rich results you qualify for, what’s working well, and what needs fixing—so your content shows up looking its best and catching more clicks.
8. Analyze clicks and impressions for low-traffic pages
Let’s say you publish a post, and you see it’s getting loads of impressions in GSC, but barely any clicks. That means people are seeing it in search, but they’re not choosing it.
So the question becomes: why?
This is where GSC shines. You can take a closer look and maybe realize the title doesn’t stand out, or the meta description doesn’t sound appealing. With that insight, you can tweak and test until you start seeing more clicks come in from search traffic.
GA4 doesn’t show you this kind of information. It only tells you what people did once they were on your site, not why they chose to come, or why they didn’t.
9. Spot new content performance early
You’ve just launched a new page or blog post. With GA4, you might have to wait until you get enough traffic to see how it’s doing. But GSC starts picking up on its performance in search from the beginning.
You can see early impressions, clicks, and what keywords it’s showing up for, even if the numbers are small. That gives you a head start. You might notice it’s ranking for a keyword you didn’t expect, so you can update the post to better match the search intent and boost your visibility.
It’s like being able to steer the ship before you’ve drifted too far off course.
10. Diagnose SEO regressions or site migration issues
Maybe you’ve redesigned your site, changed your URL structure, or migrated to a new platform. Those big changes can impact your search performance more than you think.
With GSC, you can see if your rankings have dropped or if some pages have gone missing after a site update. You get to catch the issue early, before your traffic tanks completely.
GA4 might tell you traffic is down, but it won’t tell you why. GSC gives you the “why,” so you can make fixes fast and keep your SEO strong even after major changes.
Best practices and pro tips for GSC in 2025
These tips will help you get the most out of GSC this year—whether you’re managing a small blog or a big content-heavy website.
1. Automate insights with GSC API or Looker Studio
With all the rich data GSC gives you, you can do more with less effort by plugging it into dashboards or reporting tools. Think Looker Studio or the GSC API.
The exciting part?
These tools collect your data for you, no heavy lifting is involved. It’s like having a mini data assistant who checks your site every day, pulls insights, and hands you neat data reports without you lifting a finger.
2. Connect GSC to GA4 for deeper analysis
We’re not here to bash GA4, far from it. Each tool has its strengths, and what works best depends on your goals. But to really work SEO magic and understand user behavior, link GSC with GA4. It lets you see both where traffic is coming from and what people are doing once they land on your site.
For example, someone who finds your site through a blog post might behave totally differently from someone who lands there from social media. These tools speak different languages, and when you connect them, they tell a fuller story. You’ll start seeing patterns that help you optimize what’s working and adjust what’s not.
3. Use regex filters to uncover keyword opportunities
Regular expressions (regex) lets you find patterns in search queries, basically like digging for gold in your own backyard.

Think of your website as a magical library. People are searching for books you didn’t even know you had. Regex helps you find long-tail keywords and content gaps so you can create or update content based on real searches that brought people to your site.
If you’re not already writing about these terms, you’ve just found a whole new opportunity to serve your audience.
4. Monitor sudden drops in impressions or clicks
Your goal is steady traffic and growing clicks. When those dip, it’s often the first sign something’s wrong. GSC helps you catch this early, before traffic tanks. If you spot a sudden drop, it could be a technical issue, a penalty, or a change in search trends. The sooner you see it, the faster you can respond.
GSC gives you that early warning system so you’re always in control and can fix things before they spiral.
5. Track new content performance by filtering by publish date
One of the biggest wins with GSC is that you don’t have to wait for loads of traffic to see how a new piece of content is doing. You can filter your reports to show content published after a certain date, and GSC will show you whether it’s already been indexed and is starting to rank, even if no one’s visited it yet.
It’s like getting expert feedback on your store layout before the customers walk in. You’ll see what’s working early and adjust what’s not before it’s too late.
Track, optimize, and win in Google and AI search from one platform.
6. Use the URL Inspection tool regularly on high-value pages
Not all pages are created equal.
Your homepage, pricing page, and key blog posts are your heavy hitters.
Using the URL Inspection tool is like sending those VIP pages for a health check-up. It makes sure Google is crawling and indexing them properly, and that nothing’s broken behind the scenes.
These pages matter most to your visibility, so treat them with extra care. They’re the ones doing the heavy lifting for your business.
7. Set up automatic alerts via third-party tools
GSC is brilliant for speed, but you still need to know when something changes.
That’s where third-party tools come in. Here are a few handy ones worth exploring:
- Semrush: Great for tracking keyword ranking, keeping tabs on competitors, and setting up alerts when rankings drop or jump.
- Ahrefs: Offers keyword tracking, backlink alerts, and detailed site audits. You’ll automatically be notified when your website gains or loses links.
- Frase: For those who value their content, this tool assists in writing SEO-friendly pieces and tracks how they perform over time. It’s also perfect for refreshing older pages based on what’s ranking now through its AI tool.
Set up alerts so you don’t have to manually check reports every day. You can get emails when traffic drops, rankings shift, or indexing issues pop up. It’s about moving fast. With these alerts, you’ll know the moment something’s off, so you can act before it becomes a bigger issue.
8. Clean up unnecessary pages from the index
Just like you’ve got key pages, you also might have low-value or duplicate ones that don’t need to be indexed by Google. Maybe they’re still useful to users but not worth ranking.
In those cases, you can gently ask Google to ignore them by adding a noindex tag or blocking them in your robots.txt file. The fewer low-value pages your site has, the stronger your SEO and the better your crawl efficiency.
9. Keep an eye on international targeting and hreflang tags
If your content reaches people in different countries or languages, make sure your international settings are set up right. GSC’s international targeting report helps confirm that hreflang tags are working across English and other languages.

It’s how you tell Google who you’re talking to so it shows the right content to the right people in the right place.
10. Review video indexing coverage if you use video for SEO
Video is a powerful part of content marketing strategy, especially if you embed YouTube tutorials or guides. But if you don’t make it clear to Google, those videos might not show up in search or rich snippets. GSC can tell you if your videos are indexed properly.
If not, you might need to fix the schema or embed settings. That way, your videos are easier to find and reach the people who need them.
Where to focus with GSC in 2025
Although it’s a free tool, there’s a lot inside Google Search Console.
But if there’s one thing to hold onto, it’s this: everything in there is designed to help you make better decisions with less guesswork.
And no, you don’t have to master every report or become a regex wizard overnight. What matters most is checking in regularly, knowing where to look, and letting the data guide your next step.
Whether you’re using GSC to catch site issues early, shape your content strategy, or track performance after you hit publish, it’s your quiet little ally behind the scenes.
The key?
Don’t treat GSC like a one-time setup. Make it a habit. Check in often.
Use it to spot indexing issues, track keyword shifts, and see how your content is landing. And when used well, it won’t just be a dashboard. It will become your roadmap for SEO.
The thing is: SEO moves fast. From Core Web Vitals to structured data, mobile-first indexing and constant content changes; things change quickly. But GSC helps you keep up. It’s where raw search data meets real-world performance.
And in a space where small issues can snowball fast, that kind of visibility isn’t optional, it’s essential. So start small, stay curious and let the insights do their magic.
To get started, dig deeper into Core Web Vitals to understand how to keep your site healthy and happy for your visitors.


