Here’s how to set up the Google Site Kit WordPress plugin
Although it may not be ideal for formal data reporting, it is a helpful dashboard to stay on top of site performance metrics.
On Oct. 31, Google announced the launch of its Site Kit WordPress plugin that, “enables you to set up and configure key Google services, get insights on how people find and use your site, learn how to improve, and easily monetize your content.”
This plugin allows you to easily connect the following Google Services in a dashboard format within your WordPress backend:
- Search Console
- Analytics
- PageSpeed Insights
- AdSense
- Optimize
- Tag Manager
It brings the convenience of accessing your site’s performance data while logged into the backend of the site. This is great for webmasters, developers and agencies who are often an admin for their own site or a client’s WordPress site. However, it does not offer the robust and dynamic capabilities of a Google Data Studio report or dashboard to sort data so it may not be ideal for a digital marketing manager or CMO.
With that said, it wouldn’t hurt to implement this plugin as it’s actually a nifty tool that can help you stay on top of your site’s performance metrics. It’s also another way to give Google more access to your site which can have some in-direct benefits organically.
Here is what the Google Site Kit plugin looks like within the WordPress plugin directory.
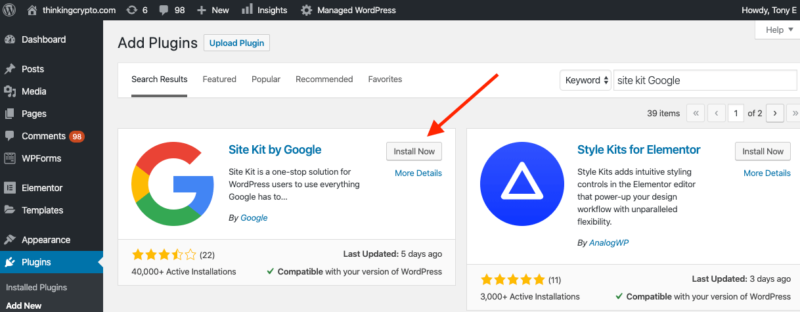
Installing and setting up Google Site Kit
To utilize the plugin, simply click install and activate as you would any other WordPress plugin. You will then be prompted to complete the set up.
Step 1
Click on the “Start Setup” button.

Step 2
You will be prompted to give access to your site’s Google Search Console profile, which means you need to sign in to the Gmail account that has access to your site’s Search Console profile.

Step 3
Once logged in you need to grant permissions for Google to access the data in your Search Console profile.
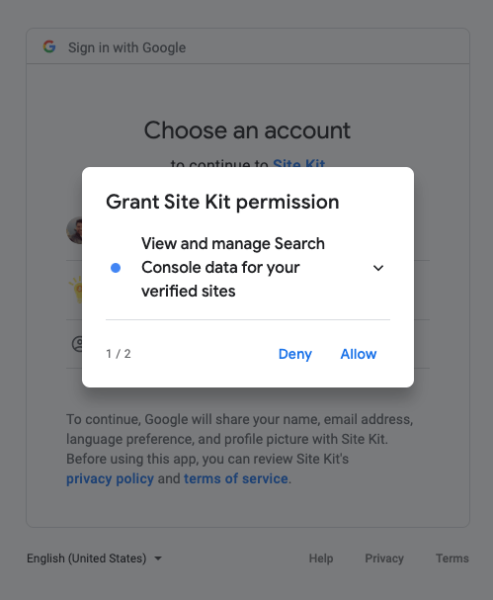
Step 4
Once you’ve granted all the respective permissions, you will get a completion notification and can then click on “Go to my Dashboard.”
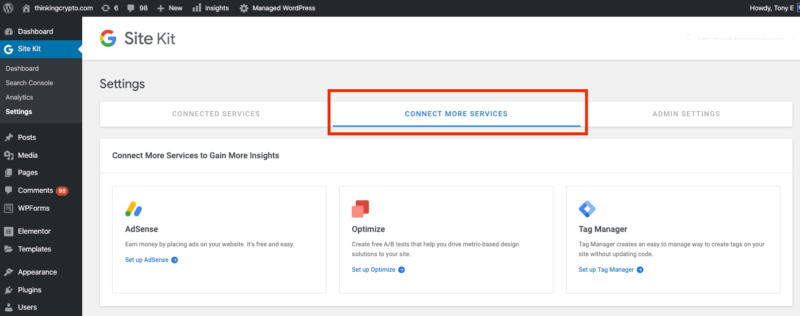
Step 5
Once you’re in the Dashboard you will see options to connect other services such as Analytics, AdSense and PageSpeed insights. You can now choose to connect these services if you like. If you go to the settings of the plugin you will see additional connection options for Optimize and Tag Manager.

Here is what the dashboard looks like with Search Console, analytics and PageSpeed Insights enabled. You can see a clear breakdown of the respective metrics.
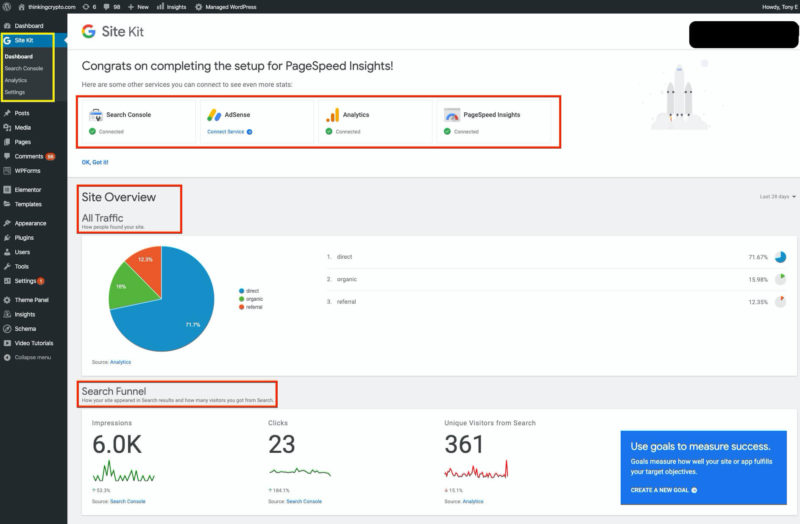
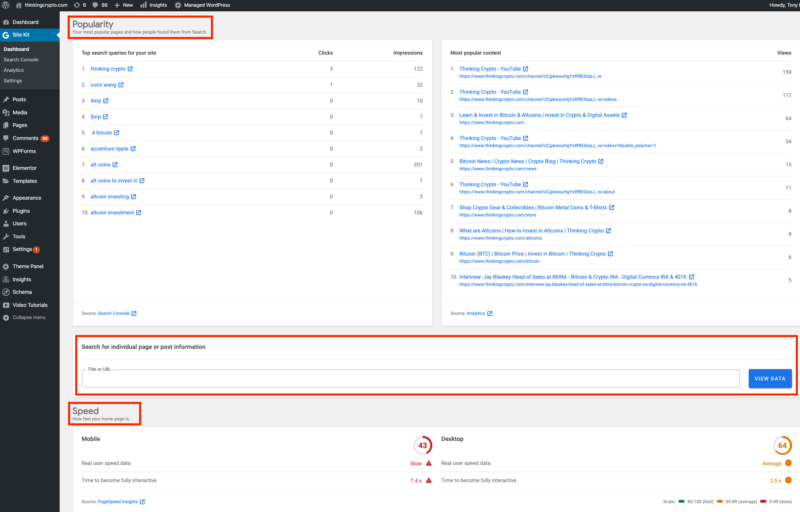
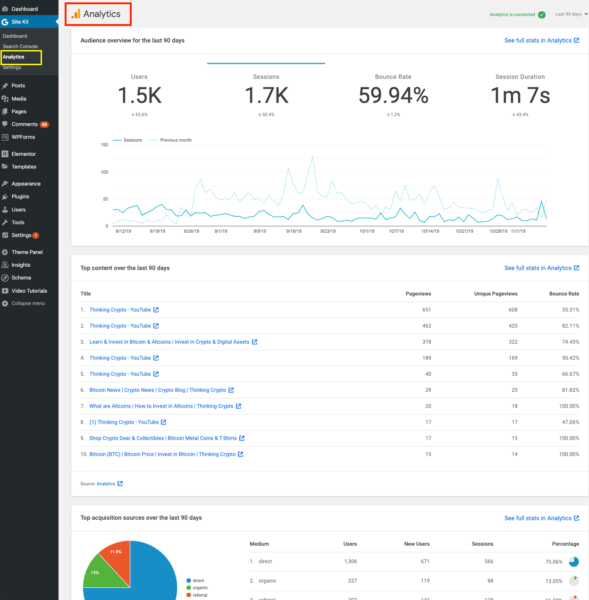
The plugin allows you to dive into each reporting respectively with navigation options on the left to drill down into Search Console and analytics.

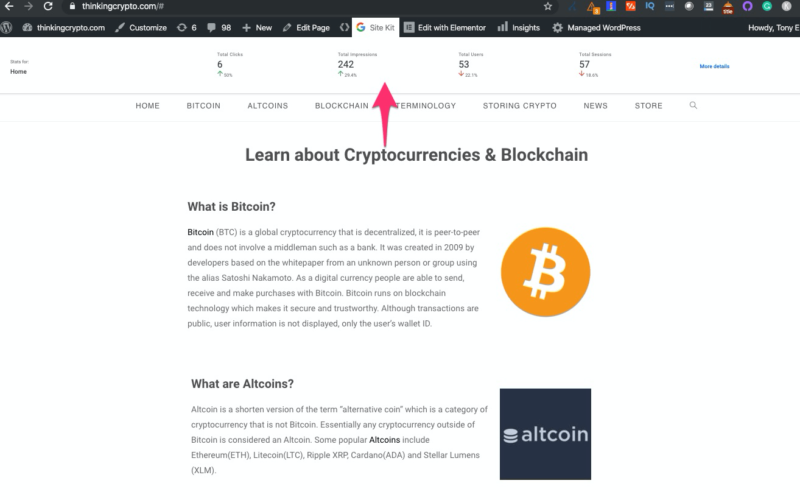
There is also an admin bar feature to see individual page stats.
In summary, this is a great plugin by Google but keep in mind it’s just version 1.0. I’m excited to see what features and integrations the later versions will have!
Contributing authors are invited to create content for Search Engine Land and are chosen for their expertise and contribution to the search community. Our contributors work under the oversight of the editorial staff and contributions are checked for quality and relevance to our readers. The opinions they express are their own.
Related stories
New on Search Engine Land
About the author