How To: Google Analytics Installation For Novices & Beginners
If you’re an intermediate to advanced Google Analytics user, this article will probably be of little interest to you personally. I suggest you bookmark it anyway as a reference for clients or friends who are just starting out with Analytics. As a long-time agency employee, I see many clients, prospects and even casual acquaintances with […]
If you’re an intermediate to advanced Google Analytics user, this article will probably be of little interest to you personally. I suggest you bookmark it anyway as a reference for clients or friends who are just starting out with Analytics.
As a long-time agency employee, I see many clients, prospects and even casual acquaintances with websites that feature absolutely no Analytics data. They have no idea what is going on, or what they’re missing because the visitors that come to their site disappear into a vacuum.
This article is meant to walk first-time installers through the process, with a few tricks and tips I’ve gleaned and picked up on along the way. Google does give pretty good instructions on basic installation, but if you couple their instructions with my tips, and you’re going to be off and running in no time at all.
Step 1 – Can You Edit Your Site?
You need to be able to edit your own site or have someone available to install the scripts for you. If you cannot meet either of these two criteria, you’re dead in the water.
You need to either a) redesign your site into a platform that is novice friendly and easy to edit (I always recommend WordPress, it’s not just for blogs) or b) get ahold of the person who designed your site and make sure they send you access to your content management system (CMS) or FTP logins. If you don’t know how to edit your site using FTP, you’ll need to find someone who does.
Step 2 – Creating The Tracking Script
Setting up your Google Analytics account is pretty easy; as with all other Google accounts, you can use a single sign in to access your account. Go to www.Google.com/analytics
Click “Sign Up” in the upper right side of the page.
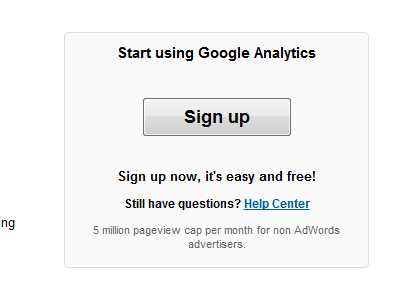
Enter the pertinent information for your site. Data sharing is your own preference, I don’t have anything to hide, so I don’t worry about it too much; you may feel differently. Once you’ve filled in the correct information, you must agree to the terms and click “Create Account.”
You are immediately taken to the screen where you can create your tracking script. This page is a tad intimidating, but don’t worry, this part will be painless.
Scroll down to the tabbed area that says “Standard” and make sure the “Standard” tab is selected.
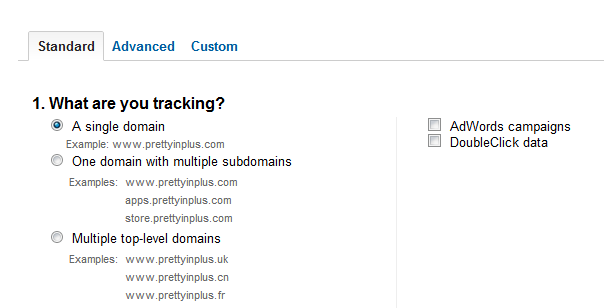
From here, you need to make some decisions. If you have only one domain, with no sub-domains and no other domains you need to track, you choose the radial button next to “A single domain.” If you are tracking a sub-domain along with a main domain, or two entirely different domains, make the correct selection.
If you’re using AdWords, you’re going to want to enable AdWords domain tracking with the check box to the right of the domain options. If you’re not yet doing AdWords, but plan to, go ahead and check the box.
If you’re not sure, you can always come back to this section and edit it. **Note – if this section is edited, the script will change and you need to change the scripts on your website.
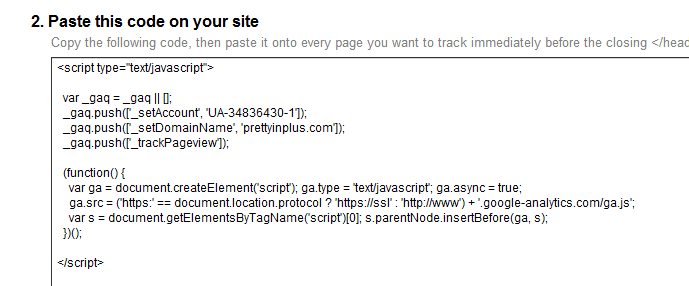
You’ve now configured the basic tag. The script is ready for installation on your website. Inevitably, there will be other metrics you’ll want to configure, those can come at a later date. For now, start with the basic tag and see what the data for your website looks like.
If you’d like to track e-commerce functions, you’ll need to read the documentation closely to figure out the best way for your shopping cart setup.
There are a variety of variables and tweaks that need to be considered. You might need to track sales tax, whereas some sites do not. Figure out what variables you need to track and work on adding each one to your tracking script. You can find documentation on configuring ecommerce tracking in the Google Developer’s help section.
Note: Remember, if you’re going to an off-domain shopping cart – either on a sub-domain or an entirely different website – you’ll need to adjust the standard tracking script setup above accordingly.
Step 3 – Installation
Once you’ve made the correct selections, you can then copy your script into your site. The script should go at the top of the page right before the </head> tag – some content management systems give you a special place to enter tracking scripts. Be familiar with what you have to make sure you’re installing the script correctly.
You can also choose to email the instructions to your webmaster just below the box that contains the code.
Voila! Basic tracking is set up and installed on your site. There is usually a delay in reporting under the “Standard Reporting” section of Google Analytics, sometimes a few hours, sometimes a few minutes. To see traffic to your site immediately, check out the “Real Time” tracking available within analytics.
Click “Home” in the orange bar, in the upper-left corner, click “Real Time” and you’ll see what is happening on your website right away.

If your site is brand new, you might need to enlist family and friends to land on some pages so you can see their activity. Actual visitors are the best indicator of correct installation. You can also check to be sure your script is installed on every page of your site using the tool at AnalyticsCheckup.com.
Having the basic data related to what is happening on your website is key to making decisions about nearly everything related to marketing. Without a way to measure results, you’re making changes based on guesses and suggestions from Aunt Pammy down the street. Get set up correctly and you’re going to start making smarter decisions right away.
Contributing authors are invited to create content for Search Engine Land and are chosen for their expertise and contribution to the search community. Our contributors work under the oversight of the editorial staff and contributions are checked for quality and relevance to our readers. The opinions they express are their own.
Related stories
About the author